Authentic Homemade Kashiwa Mochi (柏餅) Recipe: A Japanese Tradition
Have you ever dreamed of making delicate Homemade Kashiwa Mochi (柏餅 or 柏もち) in your own kitchen? Today, that dream becomes a reality! With just 6 simple ingredients and approximately 20 minutes of active preparation time, these delightful, naturally gluten-free mochi treats are poised to become a cherished favorite in your home. This comprehensive guide will walk you through every step, ensuring you master the art of this traditional Japanese sweet.
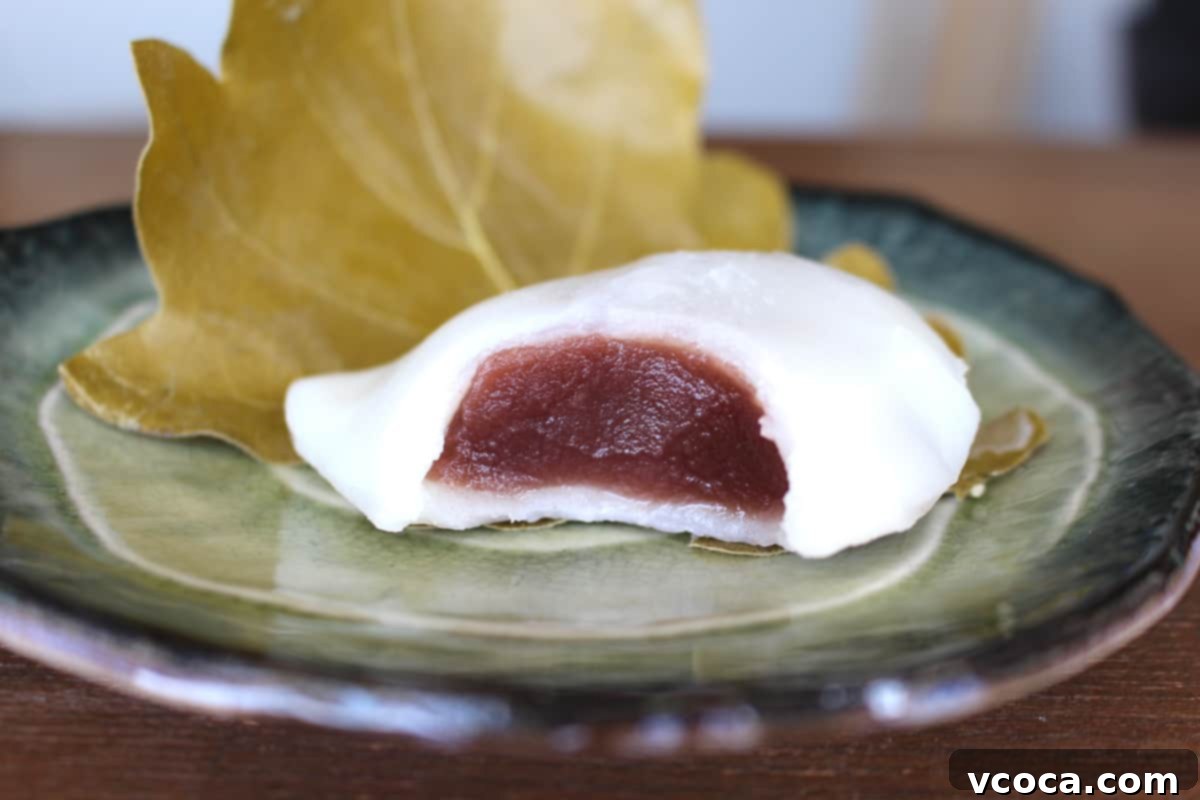
This recipe was initially published on May 5, 2016, and has been thoroughly updated with new photographs and expanded information on April 24, 2023, to provide you with the most current and helpful details.
Table of Contents
- What Is Kashiwa Mochi?
- What is Kodomo no Hi (Children’s Day)?
- The Tradition of Kashiwa Mochi for Children’s Day
- Recipe Highlights & Why You’ll Love It
- Essential Ingredients for Kashiwa Mochi
- Step-by-Step: How to Make Kashiwa Mochi
- Creative Variations for Your Mochi
- Serving Suggestions & Pairings
- Expert Tips for Mochi Making Success
- Frequently Asked Questions About Kashiwa Mochi
- More Japanese & Japanese-Inspired Dessert Recipes
What Is Kashiwa Mochi?
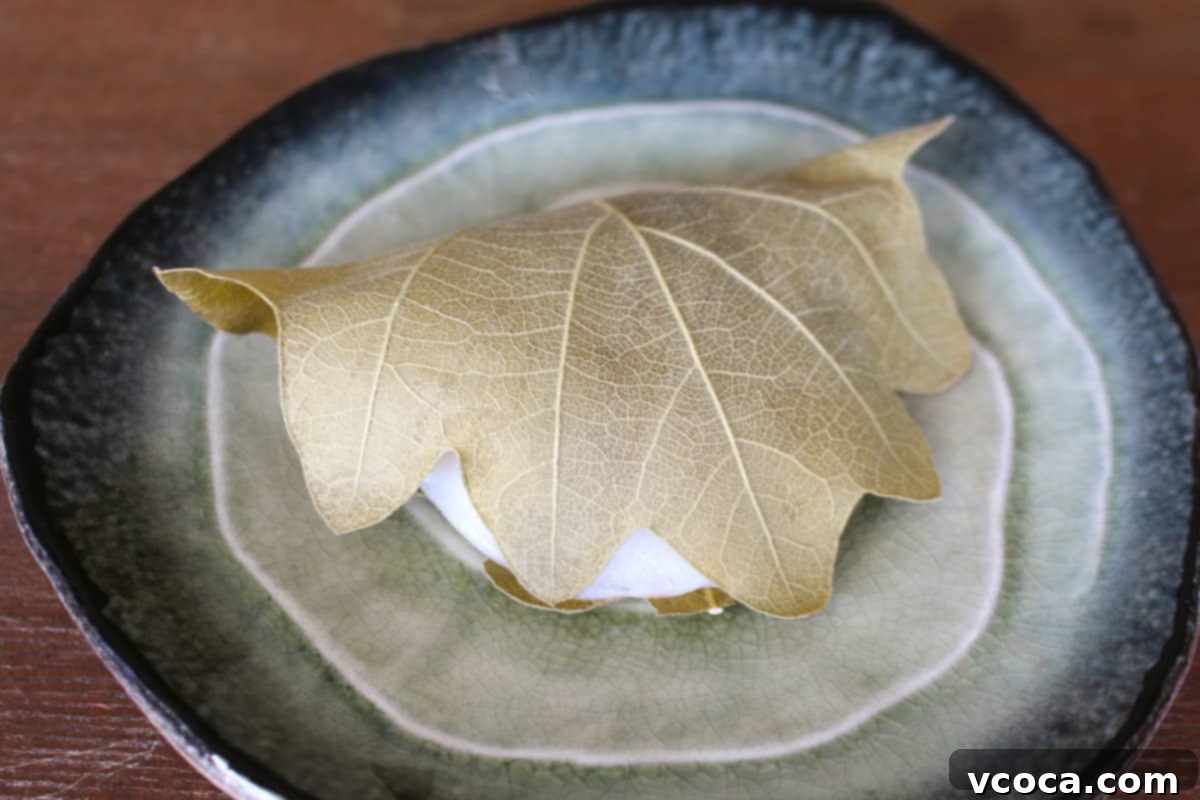
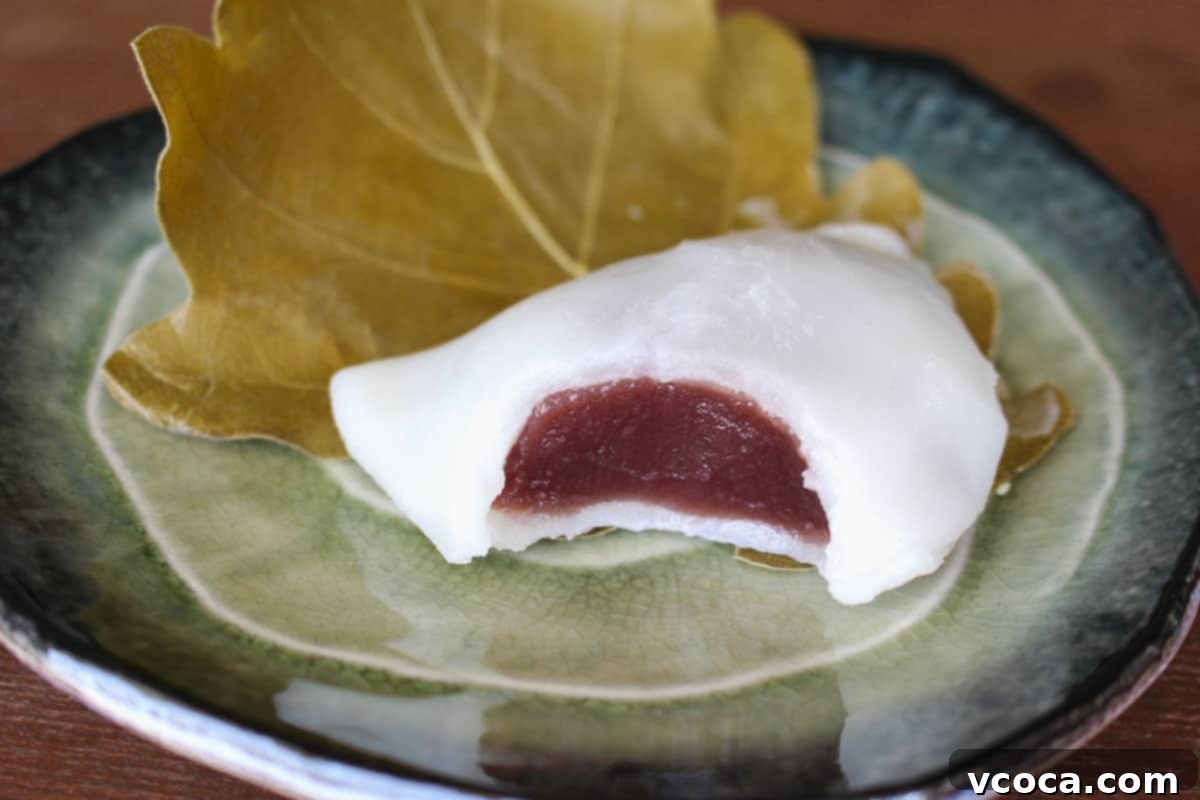
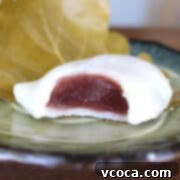
For those new to the world of Japanese sweets, Kashiwa Mochi is a truly iconic wagashi (traditional Japanese confection). It consists of a tender, slightly chewy glutinous rice cake, also known as mochi, filled with a smooth and sweet red bean paste, called anko. What makes it distinctively “Kashiwa” is its unique wrapping: a fresh or rehydrated oak leaf (kashiwa leaf). This leaf isn’t just for decoration; it imparts a subtle, earthy aroma to the mochi, enhancing the overall sensory experience.
More than just a delicious snack, Kashiwa Mochi holds a special place in Japanese culture. It’s particularly famous as a celebratory treat enjoyed on Kodomo no Hi (子供の日), or “Children’s Day,” in Japan. However, its irresistible taste means it’s a beloved dessert that can be savored and enjoyed any time of the year. Indeed, for many, including myself, it stands out as one of the most delightful Japanese desserts ever created!
What is Kodomo no Hi (Children’s Day)?
While May 5th is widely recognized for Cinco de Mayo in many parts of the world, in Japan, it marks a significant national holiday: Kodomo no Hi, or Children’s Day. This joyous occasion is dedicated to celebrating the healthy growth, happiness, and well-being of all children across the nation. It’s a day for families to spend time together, appreciate their children, and wish them a prosperous future.
Historically, Kodomo no Hi was also known as Tango no Sekku (端午の節句), traditionally celebrated as the “Boy’s Festival.” On this day, families with sons would display samurai helmets (kabuto) and warrior dolls, along with flying carp streamers (koinobori) outside their homes, symbolizing strength, courage, and success. But don’t worry, girls have their special day too! Hinamatsuri (雛祭り), or “Girl’s Day,” celebrated on March 3rd, is dedicated to celebrating the health and happiness of daughters, ensuring every child feels cherished.
One of the most heartwarming ways families celebrate Kodomo no Hi is by sharing and eating these special kashiwa-wrapped mochi. The symbolism behind the kashiwa leaf is deeply meaningful: oak leaves do not fall from the tree in the cold winter months but rather remain until new leaves emerge in spring. This natural cycle beautifully represents the continuity of generations, symbolizing parental wishes for the prosperity and healthy succession of their descendants. It’s a truly lovely tradition, isn’t it?
The Tradition of Kashiwa Mochi for Children’s Day
The culinary tradition of eating Kashiwa Mochi to commemorate Children’s Day has a rich history, tracing its origins back to the Edo period in the early 1600s. During this era, Children’s Day, then primarily focused on boys’ growth and future, saw the emergence of Kashiwa Mochi as a staple food. It was widely believed that consuming this particular mochi would bestow strength, vitality, and good health upon young boys, preparing them for a robust life ahead.
The choice of the oak tree (kashiwa) for its leaves is far from arbitrary. The oak is a powerful symbol in Japanese culture, representing unwavering strength, resilience, and longevity. Its ability to retain its old leaves until new ones sprout signifies a continuous lineage and the flourishing of future generations – a perfect emblem for a holiday celebrating children. By wrapping the mochi in these symbolic leaves, families wished for their sons to grow as strong and resilient as the oak tree itself, carrying on the family name with honor.
As centuries passed, the tradition of enjoying Kashiwa Mochi on Children’s Day diffused from Edo (modern-day Tokyo) to various regions across Japan, becoming a cherished custom for families everywhere. While the holiday has broadened its embrace to celebrate all children, regardless of gender, the act of sharing this beloved sweet remains a pivotal and emotionally resonant part of the festive celebrations. It’s a delicious link to history and a sweet prayer for the future.
Recipe Highlights & Why You’ll Love It
Prepare to delight your taste buds and impress your loved ones with these uniquely delicious homemade Kashiwa Mochi treats. You certainly won’t regret taking the time to make them!
Beyond being incredibly tasty, this Kashiwa Mochi recipe boasts several advantages:
- Quick & Easy Process: Despite their elegant appearance, making these sweet red bean mochi is a surprisingly straightforward and enjoyable process. The active preparation time is minimal, and it’s even a fantastic activity to involve children in, creating wonderful family memories.
- Allergen-Friendly Goodness: This recipe is a fantastic choice for many dietary needs as these adzuki bean mochi are naturally gluten-free, dairy-free, soy-free, nut-free, and corn-free. This makes them a safe and inclusive treat for almost everyone to enjoy without worry.
- Wholesome & Nutritious: While typically considered a dessert, these Japanese mochi offer a surprisingly virtuous profile. They are primarily crafted from rice and beans—ingredients that, when combined, form a perfect protein. Lightly sweetened with granulated sugar, all components are easy to recognize and pronounce, free from artificial preservatives, colors, or mysterious additives. Enjoy a dessert that feels good to eat!
Essential Ingredients for Kashiwa Mochi
As promised, you’ll only need a concise list of readily available ingredients to craft this authentic Kashiwa Mochi recipe. Here’s what you’ll need to gather, along with some helpful tips:
- Joshinko Rice Flour (上新粉): This specialized rice flour is derived from finely milled non-glutinous rice (uruchi rice) that has been soaked, steamed, dried, and then ground into a fine powder. It provides a unique chewy yet firm texture to the mochi. If authentic Joshinko is hard to find, you can substitute it with regular glutinous rice flour or Mochiko Sweet Rice Flour, though the final texture may vary slightly.
- Mochi Flour (もち粉): Also known as Mochiko, this flour is made from short-grain glutinous rice. Unlike Joshinko, Mochiko is created by soaking glutinous rice overnight, steaming it, pounding it into a smooth paste, and then drying and grinding it into a powder. Mochiko is crucial for achieving the characteristic soft, elastic, and chewy texture of mochi, and therefore, it is truly essential with no direct substitutes if you want genuine mochi.
- Granulated Sugar: Sugar is used to sweeten the mochi dough, creating a lovely balance against the subtle, earthy notes of the oak leaf and the rich filling. For those looking to manage sugar intake, alternatives like honey, maple syrup, or agave nectar can be used, adjusting quantities to taste.
- Water: Crucial for binding the flours together, creating a pliable dough that is easy to shape. Using filtered water can enhance the overall purity of flavor. For a slight variation in taste, you could experiment with milk or coconut water, which would add a creamy richness.
- Anko (Sweet Red Bean Paste): The heart of Kashiwa Mochi! This delightful paste is traditionally made from azuki beans that are boiled, mashed, and sweetened with sugar. It offers a wonderfully earthy and subtly sweet flavor that complements the mochi perfectly. While store-bought anko offers convenience, a homemade version, such as this anko recipe, will truly elevate your mochi. If red bean paste isn’t your preference or is unavailable, feel free to explore other sweet fillings like peanut butter, Nutella, or even fresh fruit for a modern twist.
- Potato Starch: This is primarily used for dusting your work surface and hands. Its purpose is to prevent the sticky mochi dough from adhering, making the shaping process much smoother and cleaner. Cornstarch or tapioca starch are excellent alternatives if potato starch is not on hand.
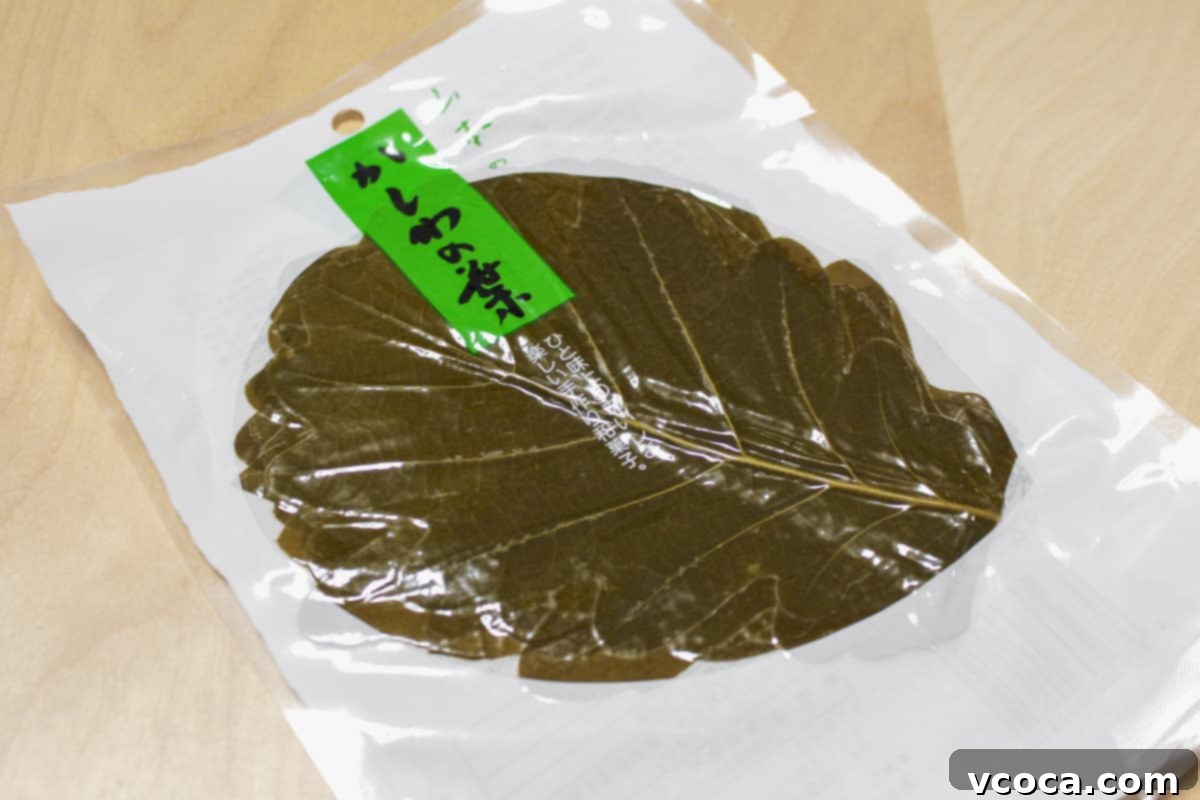
- Kashiwa Leaves (Oak Leaves): These are the signature element that defines Kashiwa Mochi. Traditionally sourced from the Japanese oak tree, they are used to wrap each mochi, not to be eaten, but to symbolize the prosperity of a new generation and to impart a subtle, woody aroma. They also help keep the mochi fresh. If authentic kashiwa leaves are difficult to find, you can consider using bamboo leaves, banana leaves, or even culinary parchment paper as alternatives, though the traditional aroma will be different.
Step-by-Step: How To Make Kashiwa Mochi
Crafting this delightful red bean mochi recipe is surprisingly simple and comes together with minimal fuss. Follow these detailed steps for perfect results every time:
Step 1: Prepare Kashiwa Leaves. The kashiwa leaves are typically sold either dried or vacuum-packed. If you’re using dried leaves, they must be rehydrated by gently boiling them in hot water until pliable (usually 5-10 minutes). For vacuum-packed leaves, a simple rinse under cold water followed by patting them dry with a paper towel is sufficient. Once prepared, set them aside carefully; they will be used to wrap your finished mochi later.
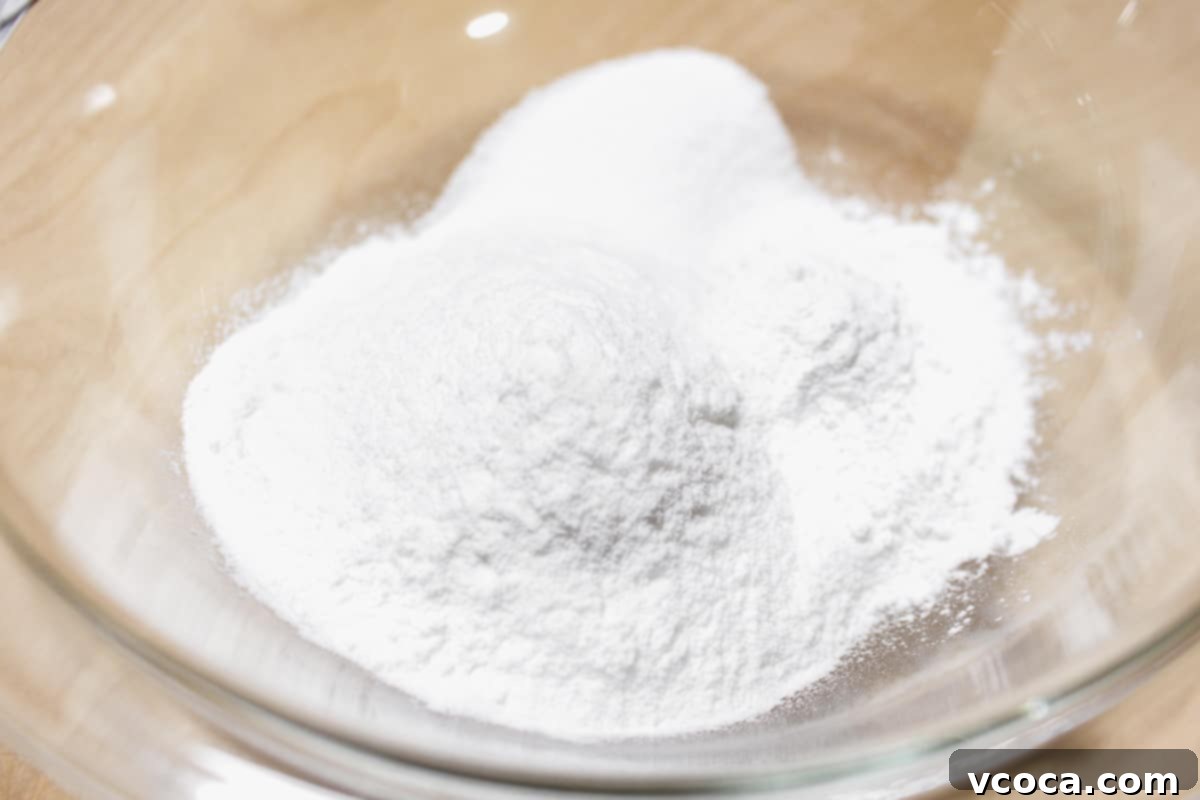
Step 2: Combine Dry Ingredients. In a large mixing bowl, thoroughly combine the joshinko rice flour, mochi flour, and granulated sugar. Whisk or stir until all ingredients are evenly distributed. This ensures a consistent texture throughout your mochi dough.
Step 3: Form Mochi Paste. Gradually add the water to the dry ingredients while continuously stirring. Continue mixing until the mixture transforms into a thick, uniform paste. It should be smooth and free of lumps, resembling a soft batter.
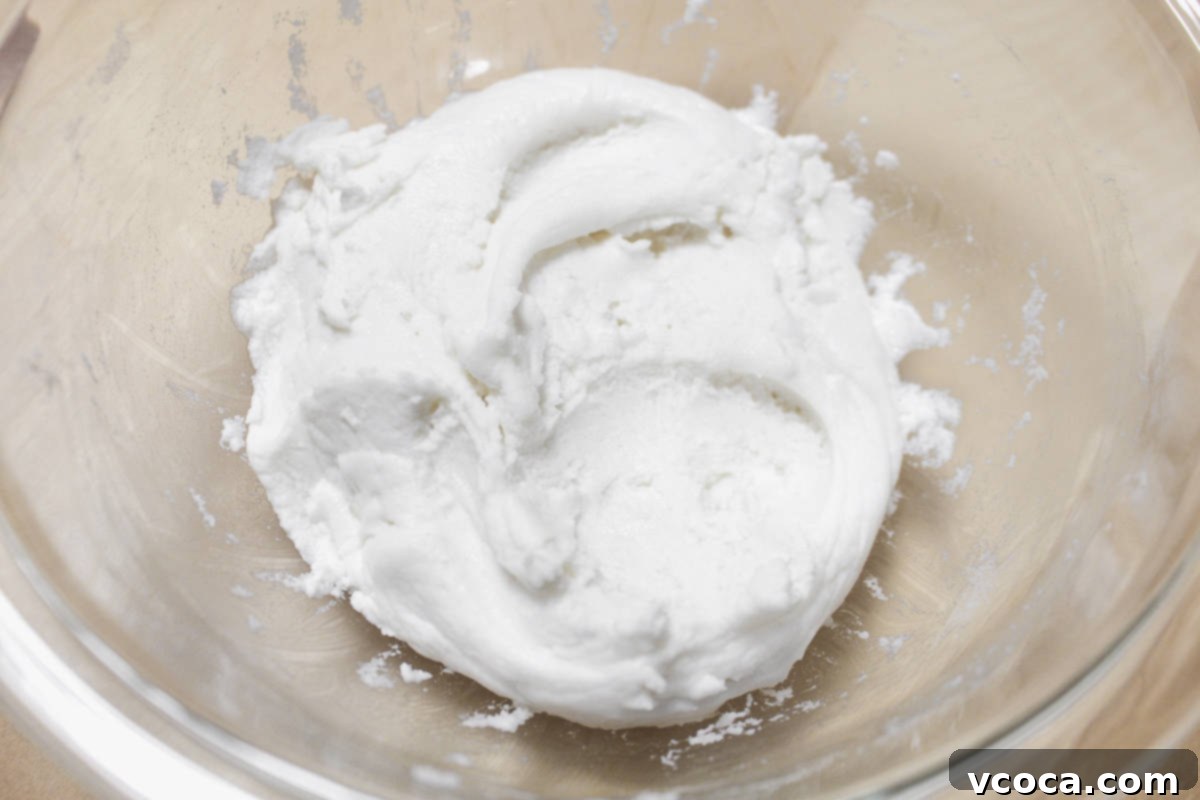
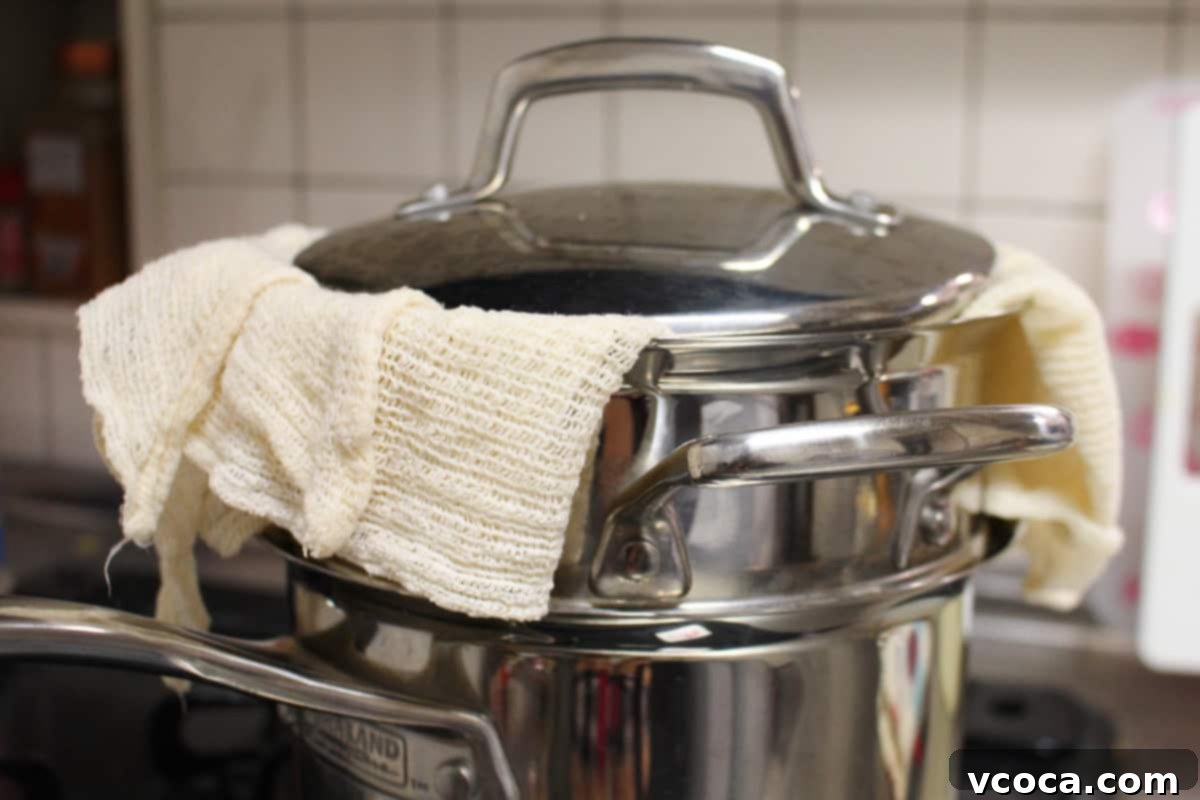
Step 4: Steam Mochi Dough. Line your steamer basket with a piece of cheesecloth or parchment paper to prevent sticking. Carefully pour the mochi paste into the lined steamer. Cover the steamer tightly with a lid, ideally with another layer of cheesecloth placed *under* the lid to absorb any condensation and prevent water from dripping onto the dough (this is key for a non-soggy mochi!). Steam for 20 minutes, or until the dough becomes translucent and springy. Keep the parchment paper in place; it will be useful for later steps.
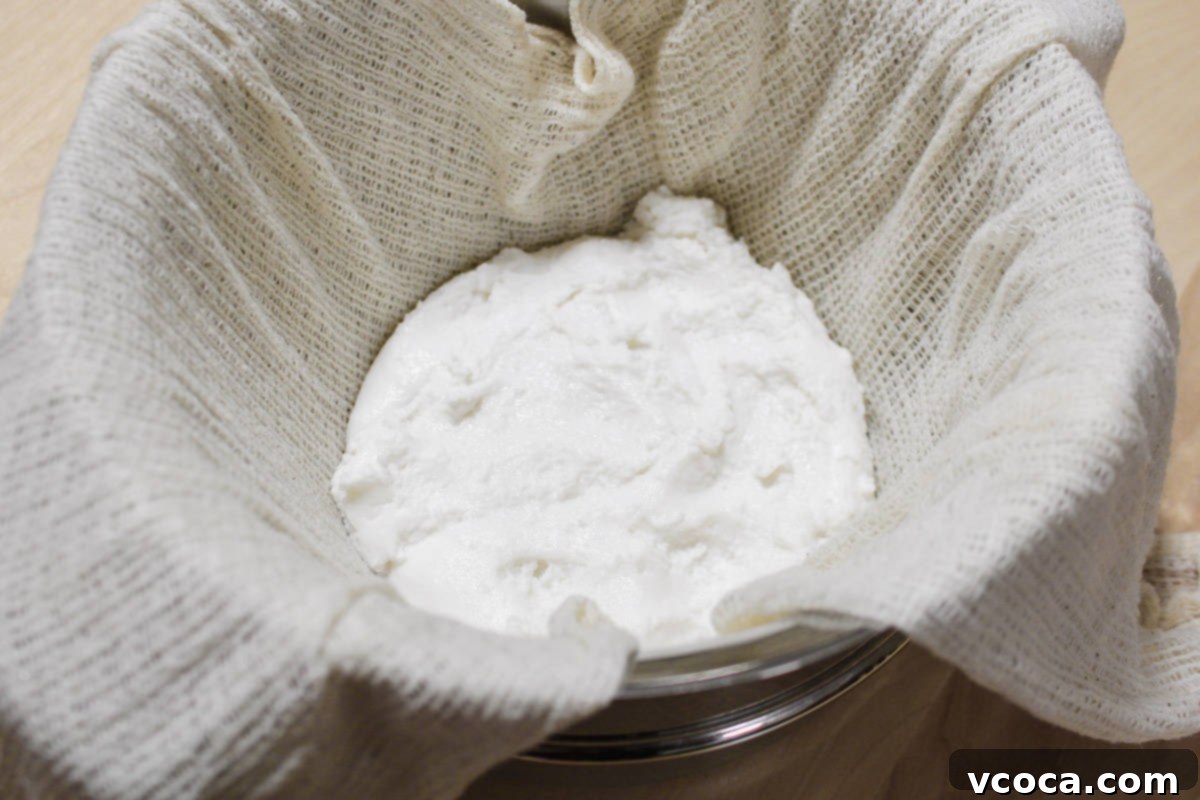
Step 5: Divide Anko. While your mochi is steaming, take your sweet red bean paste (anko) and divide it into 8 equal portions. Roll each portion into a neat ball. This makes the assembly process quicker and more uniform.
Step 6: Knead and Divide Mochi. Once the mochi is done steaming, carefully remove it from the steamer. While still hot, knead it thoroughly until it forms a smooth, cohesive, and elastic ball. Be cautious as it will be very hot; you can protect your hands by wearing rubber gloves, using a damp tea towel, or frequently dipping your hands in ice water. Once kneaded, divide the large mochi ball into 8 equal pieces. A kitchen scale can help ensure even portions.
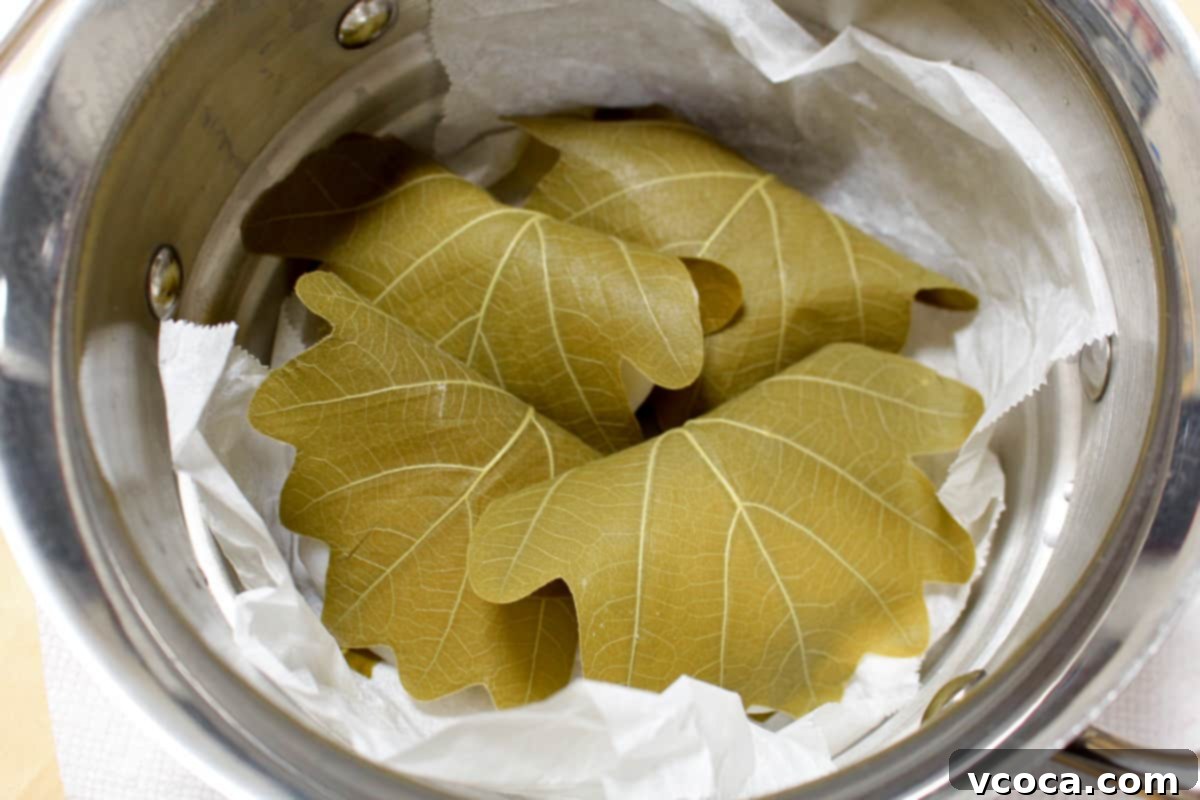
Step 7: Assemble Kashiwa Mochi. Lightly dust your clean work surface and your hands with potato starch or cornstarch to prevent sticking. Take one piece of mochi and flatten it into an oval shape, roughly 4-5 inches long. Place one of the pre-rolled red bean paste balls in the center of the mochi oval. Gently bring the edges of the mochi dough over the anko, sealing them completely to encapsulate the filling. Pinch the seams to ensure no filling escapes. Place the formed mochi on the shiny side of a prepared kashiwa leaf, then fold the leaf over the mochi, mimicking a clam shell. Repeat with the remaining mochi and anko balls.
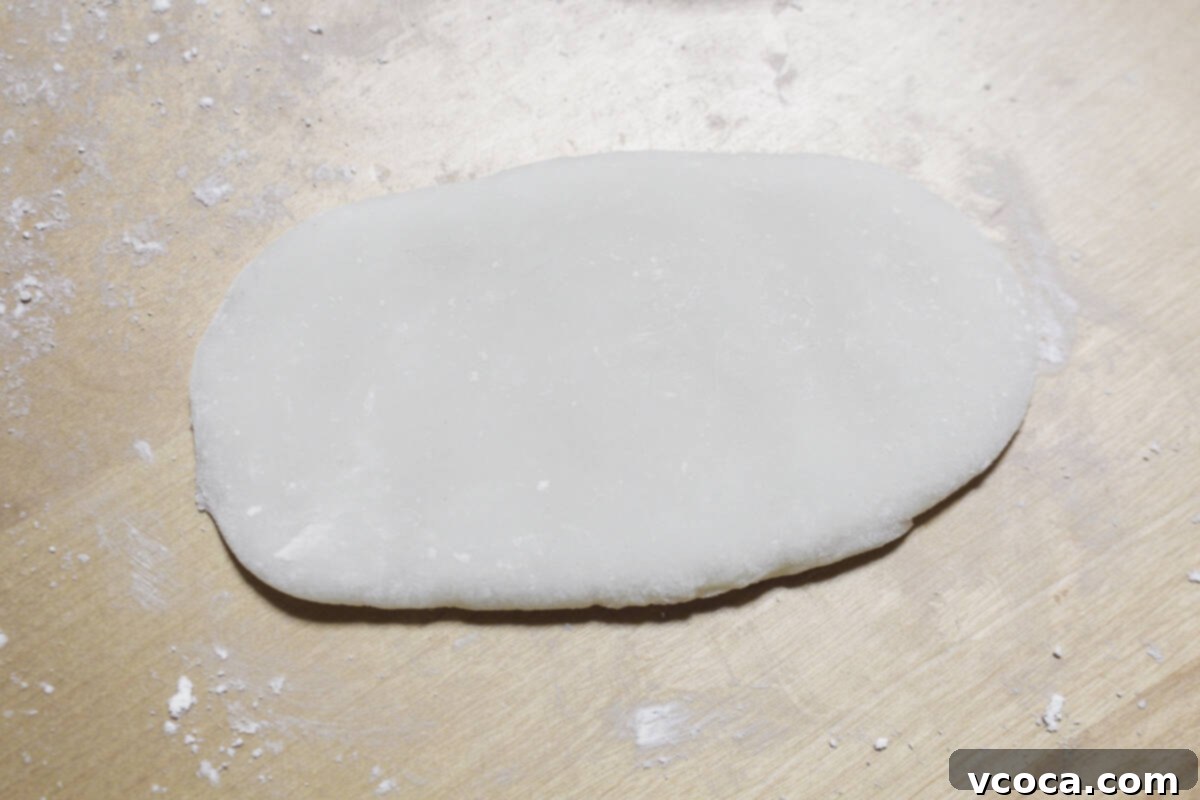
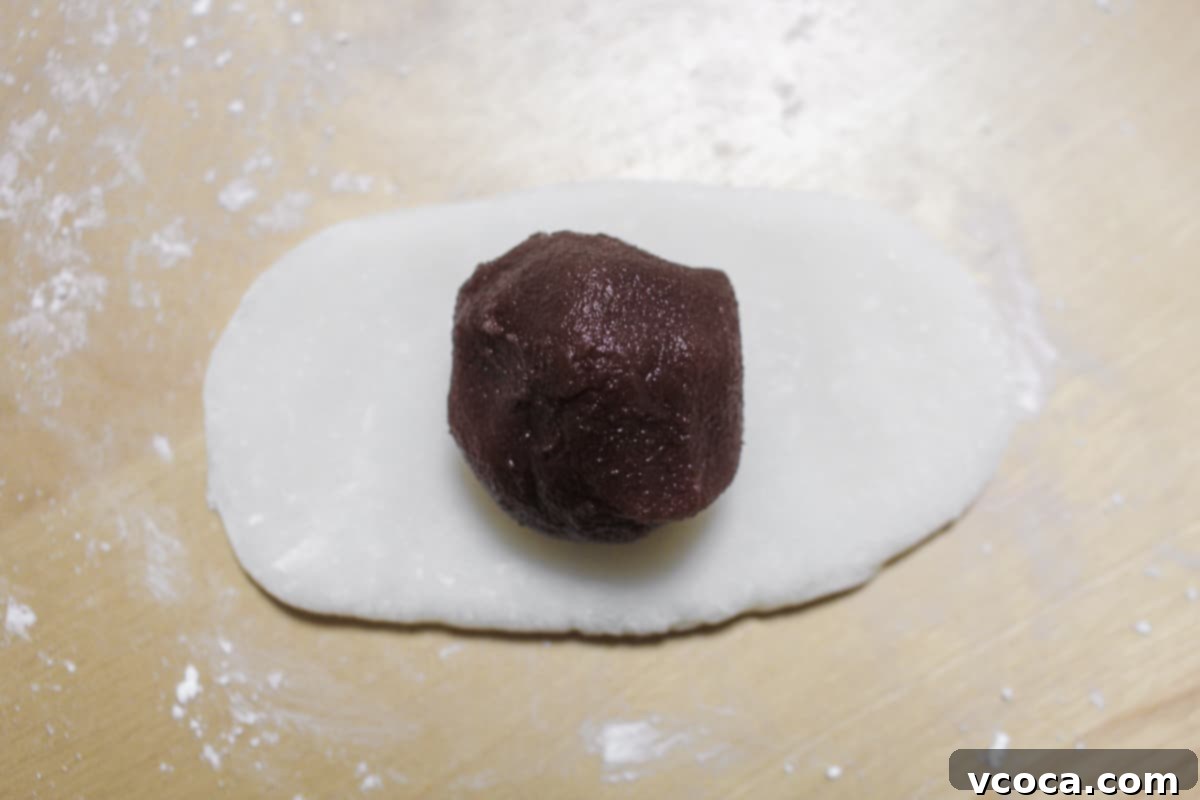
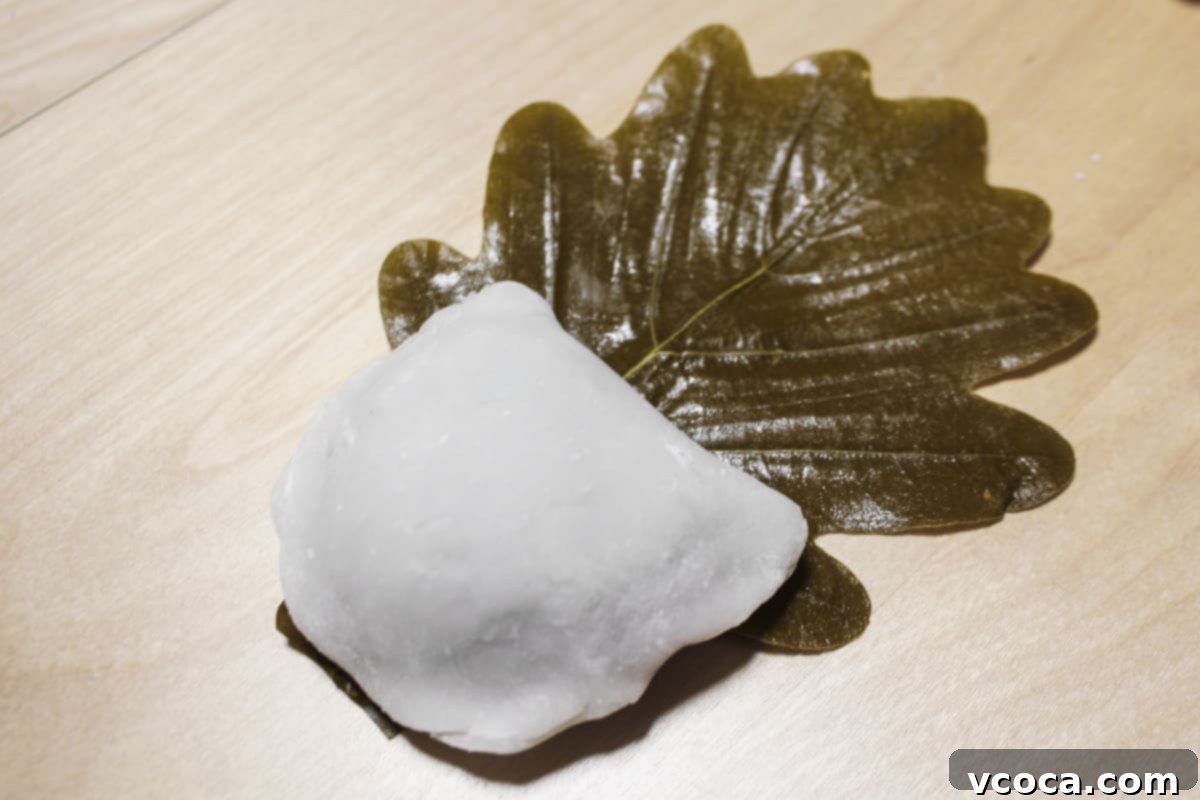
Step 8: Final Steam. Although your kashiwa mochi look almost complete, a final steaming step is essential for setting the shape and ensuring the perfect soft texture. Carefully place the wrapped mochi back into the steamer (using the same parchment paper lining from before). Cover and steam for an additional 5 minutes. Depending on the size of your steamer, you might need to steam them in batches to avoid overcrowding. Once steamed, remove and allow them to cool completely before serving, as they are too soft to enjoy when warm.
Creative Variations for Your Mochi
Kashiwa Mochi is a fantastic canvas for culinary creativity! While the traditional red bean filling is classic, there are countless ways to personalize this delightful Japanese sweet. Here are some exciting variations to inspire your next batch:
- Matcha Kashiwa Mochi: Infuse your mochi with the vibrant flavor and beautiful color of green tea. Simply add a tablespoon or two of high-quality matcha powder to the mochi dough mixture in Step 2. This will give your mochi a subtle earthy bitterness that pairs wonderfully with sweet fillings. For an even more intense matcha experience, you can also blend some matcha powder directly into your red bean filling.
- Chocolate Mochi: For the chocolate lovers, transform your traditional mochi into a rich, decadent treat. Incorporate some unsweetened cocoa powder (start with 1-2 tablespoons) into your mochi dough for a chocolatey base. Instead of anko, fill these chocolate mochi with creamy chocolate ganache, a dollop of Nutella, or even finely chopped chocolate pieces for a delightful surprise.
- Kinako & Nutty Coatings: After the final steaming and cooling, you can add an extra layer of flavor and texture. Try rolling your mochi in toasted kinako (roasted soybean flour) for a nutty, aromatic finish. Alternatively, finely chopped nuts like pistachios, almonds, or walnuts can add a satisfying crunch. For a playful touch, especially if serving to children, colorful sprinkles or mini chocolate chips make for a fun topping.
- Seasonal Fruit Fillings: Embrace the bounty of the seasons by filling your mochi with fresh fruit. Sliced strawberries, kiwi, or mandarins can add a refreshing tartness and juicy texture that contrasts beautifully with the soft mochi. A small amount of sweetened cream cheese or whipped cream can also be added alongside the fruit for a modern twist.
- White Bean Paste (Shiro An): For a milder, more delicate flavor profile, substitute the traditional red bean paste with shiro an (white bean paste). This is a popular alternative in Japan and offers a creamy texture with a less intense bean flavor.
Serving Suggestions & Pairings
Kashiwa Mochi are incredibly versatile and can be enjoyed in various settings. They are, of course, absolutely perfect for celebrating traditional spring festivals, especially Kodomo no Hi in Japan, where they are a central part of the festivities.
Beyond holidays, they make an exquisite accompaniment for your daily afternoon tea. Imagine them served on a beautiful platter alongside other light treats like crisp gluten-free chocolate chip cookies, delicate matcha financiers, or elegant finger sandwiches. The subtle earthiness of the kashiwa leaf-wrapped mochi beautifully complements the aroma of green tea or even a mild black tea.
Given their light and refreshing nature, Kashiwa Mochi are also fantastic for packed lunches, picnics, or outdoor gatherings. The protective oak leaves are not just symbolic; they also help keep the mochi fresh and prevent it from sticking to other items in your lunchbox. Depending on the season, they can also serve as a truly lovely and unexpected post-dinner treat. For a complete traditional Japanese feast, consider serving a platter of these red bean mochi after hearty main courses like a flavorful Japanese vegan katsu curry or a comforting vegan Japanese cream stew. Their sweet simplicity provides a perfect palate cleanser and a delightful end to any meal.
Expert Tips for Mochi Making Success
Achieving perfectly tender and delicious Kashiwa Mochi is easier than you think, especially with these insider tips:
- Prevent Water Dripping: To avoid soggy mochi, always line your steamer with parchment paper. Crucially, place a piece of clean cheesecloth (or a clean tea towel) *under the lid* of your steamer. This acts as a barrier, absorbing any condensation and preventing water droplets from falling onto your delicate mochi.
- Cool Completely Before Eating: Resist the temptation to bite into a warm Kashiwa Mochi! The texture is simply too soft and sticky when hot. For the ideal tender, chewy consistency, let them cool completely to room temperature. This allows the mochi to firm up to its delightful texture.
- Precision is Key – Use a Kitchen Scale: Mochi making is a bit like baking, where precision yields the best results. Investing in a kitchen scale is highly recommended. Accurately measuring your rice flours, especially Joshinko and Mochiko, is vital for achieving the correct dough consistency and texture.
- Hot Water for Mixing: When combining your dry ingredients with water, use hot water. This helps the rice flours absorb the liquid more efficiently and evenly, resulting in a smoother, more elastic, and easier-to-work-with dough.
- Gentle Handling – Avoid Overworking the Dough: Unlike some bread doughs, mochi dough can become tough and overly chewy if it’s overworked. Be gentle during the kneading process (Step 6), aiming for a smooth, homogenous ball without excessive manipulation.
- Quality Ingredients Matter: The taste of your Kashiwa Mochi will largely depend on the quality of your ingredients, especially the anko filling. Fresh, high-quality sweet red bean paste can make a significant difference in the flavor and overall enjoyment of your homemade treats.
- Keep Dough Covered: Mochi dough can dry out quickly when exposed to air, becoming stiff and difficult to work with. While shaping individual pieces, always keep the remaining dough covered with a damp cloth or plastic wrap.
- Utilize a Non-Stick Surface: Mochi dough is inherently sticky. To prevent frustration and tearing, ensure your work surface is well-dusted with potato starch (or cornstarch) or use a non-stick surface like parchment paper or a silicone mat when flattening and shaping the mochi.
- Proper Storage: To maintain freshness and texture, store finished Kashiwa Mochi in an airtight container in the refrigerator for up to 1-2 days. Before serving, let them come back to room temperature for about 15-20 minutes; this will restore their optimal soft and chewy texture.
Frequently Asked Questions About Kashiwa Mochi
Imagine a truly enchanting culinary experience. You bite into a cloud-like, incredibly soft, and delightfully chewy mochi dough that gently yields to reveal a rich, smooth, and earthy-sweet red bean paste (anko). As this delicate sweetness melts in your mouth, a subtle, almost woodsy aroma from the oak leaf wrapped around the mochi subtly dances on your tongue. It’s a complex yet harmonious flavor profile that evokes a feeling of tranquility and tradition, much like taking a stroll through an ancient, enchanted Japanese forest. Each Kashiwa Mochi is like a small, edible fairytale, offering an unexpected, delightful surprise with every single bite.
No, the kashiwa (oak) leaf is not intended to be eaten. Its primary roles are both decorative and functional. Symbolically, it represents the prosperity of generations. Functionally, it helps to keep the mochi fresh, prevents it from sticking to packaging or other mochi, and imparts a very subtle, earthy fragrance to the sweet. The leaf itself has a rather tough and fibrous texture and lacks significant flavor, so it is traditionally unwrapped and discarded before you enjoy the delicious mochi inside.
While both are rice flours, they come from different types of rice and undergo different processing. Joshinko (上新粉) is a non-glutinous rice flour made from regular short-grain Japonica rice (uruchi rice). It gives mochi a firm, slightly chewy, and less elastic texture. Mochiko (もち粉), on the other hand, is glutinous sweet rice flour made from short-grain glutinous rice (mochigome). This is the key ingredient for the characteristic soft, stretchy, and very chewy texture typically associated with mochi. Using a combination, as in this recipe, helps achieve the perfect balance of firmness and elasticity for Kashiwa Mochi.
Homemade Kashiwa Mochi are best enjoyed fresh on the day they are made. Mochi tends to harden when refrigerated and can lose its soft, chewy texture. However, if you need to store them, place them in an airtight container at room temperature for up to 1 day, or in the refrigerator for up to 2 days. When consuming from the refrigerator, allow them to return to room temperature (about 15-20 minutes) for the best texture. Freezing is not recommended as it drastically changes the mochi’s texture.
Thank you for exploring this guide on how to make delicious Kashiwa Mochi at home! I sincerely hope this detailed post has ignited your inspiration to try your hand at crafting this cherished traditional Japanese sweet treat. Remember, cooking and baking are all about practice and enjoyment, so don’t be shy about experimenting with different fillings and flavors to find your perfect combination. Most importantly, savor every moment of the process, from mixing to steaming to finally tasting your homemade creation!
More Japanese & Japanese-Inspired Dessert Recipes
- If you loved Kashiwa Mochi, you might also enjoy Sakura Mochi, another springtime favorite, distinctive with its pink hue and wrapped in a preserved cherry blossom leaf! It’s often enjoyed in March to celebrate Hinamatsuri, the Girl’s Day festival.
- For an even simpler mochi experience, Shiratama Dango are incredibly easy to make! My personal favorite way to enjoy them is topped with sweetened kinako powder, offering a delightful nutty flavor.
- Are you a passionate fan of matcha desserts? Then you absolutely must try these amazing matcha cupcakes with white chocolate frosting, these irresistible matcha Oreo blondies, and this decadent matcha cake – all are my top picks for incorporating the unique flavor of matcha into delicious sweet treats!
Kashiwa Mochi Recipe
Print
Pin
Rate
Ingredients
- 2 cups joshinko rice flour (上新粉)
- ⅓ cup mochiko flour (もち粉)
- ¼ cup granulated sugar
- 1½ cups water
- 1½ lbs sweet red bean paste
- potato starch or corn starch
- 19 kashiwa leaves, dried or vacuum packed
Instructions
-
Prepare the kashiwa leaves. If using dried leaves, rehydrate them in water. If using vacuum packed leaves, rinse them with water and pat dry with a paper towel. Set it aside to use later.
-
In a bowl, mix the joshinko rice flour, mochi flour, and sugar. Slowly pour the water and stir until it forms a paste.
-
Line a steamer with parchment paper or cheesecloth, and put the paste inside. Steam for 20 minutes.
-
While waiting for the mochi, divide and roll the red bean paste into 8 equal balls.
-
Take the mochi out of the steamer and knead until it forms a ball. Divide into 8 equal pieces.
-
Take one piece of mochi and flatten it out into an oval. Place a red bean paste ball in the center and wrap it with the mochi. Make sure the sides are completely sealed.
-
Place each mochi on the shiny side of the kashiwa leaf and fold the leaf over the mochi. Put them back in the steamer for an additional 5 minutes. Let them cool completely before eating.
Nutrition