Irresistibly Creamy No-Bake Vegan Chocolate Haupia Pie (Gluten-Free & Hawaiian-Inspired)
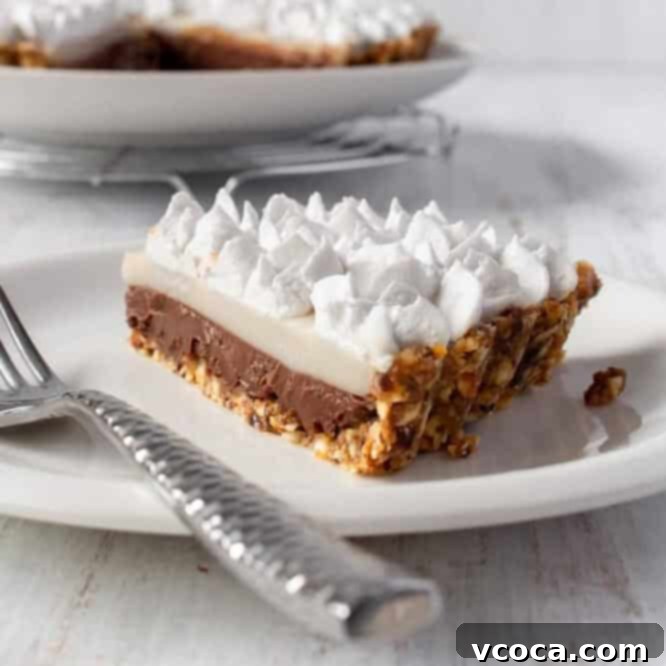
Craving a taste of the tropics without turning on your oven? This incredible **Vegan Chocolate Haupia Pie** is your ultimate answer! Inspired by the legendary Ted’s Bakery classic from Hawaii, this recipe delivers a rich, creamy, and silky-smooth dessert that’s entirely plant-based, gluten-free, and requires absolutely no baking. It’s the perfect make-ahead treat, ideal for scorching summer days, backyard BBQs, or whenever you desire a luxurious, fuss-free dessert that combines the best of chocolate and coconut flavors.
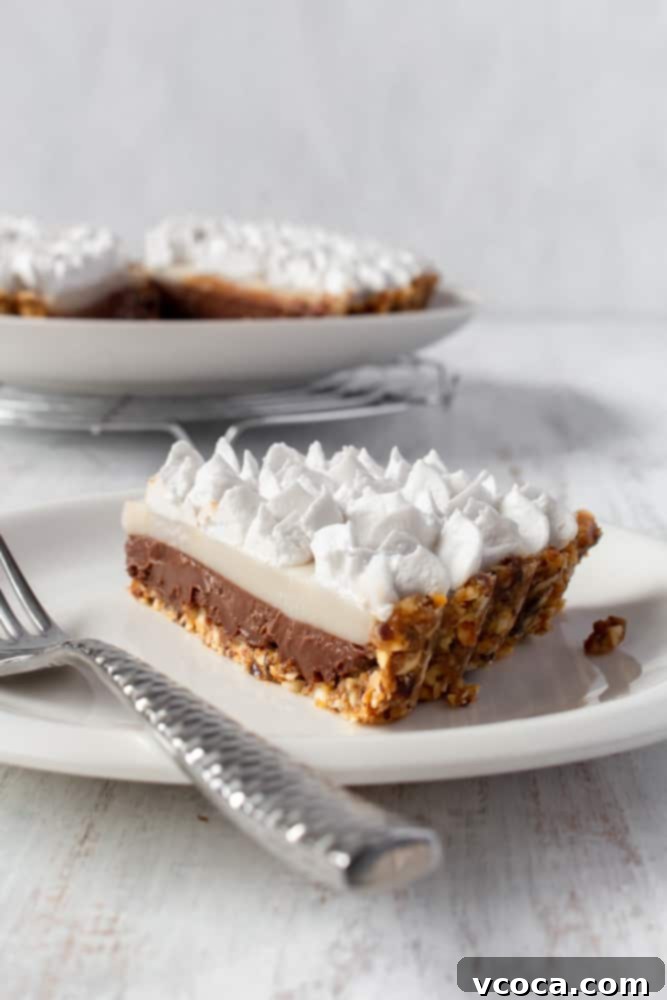
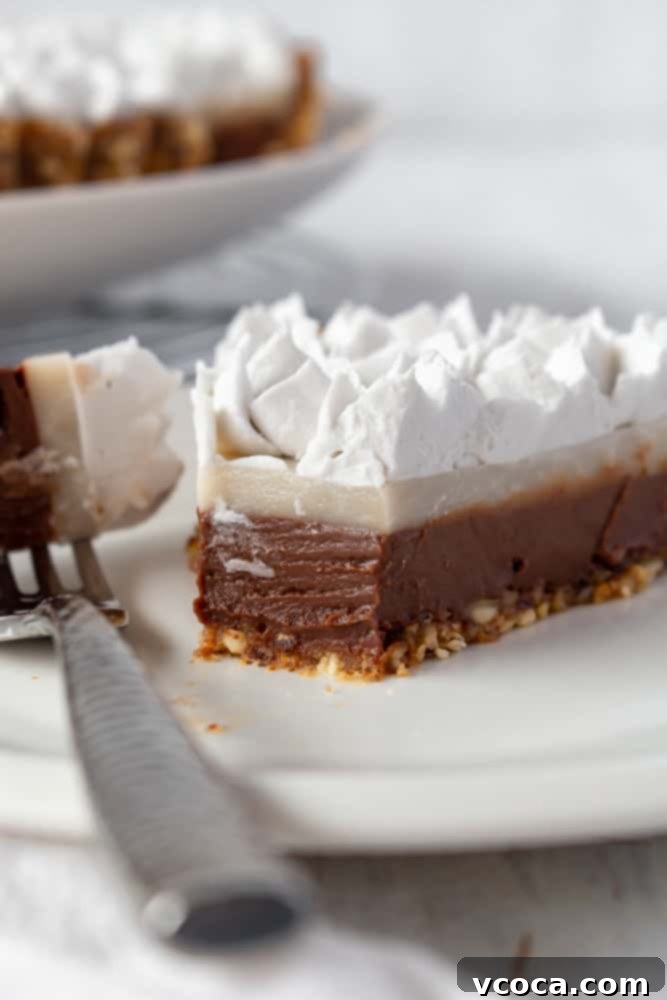
Imagine a velvety chocolate layer topped with a pristine, wobbly haupia (traditional Hawaiian coconut pudding) custard, all nestled in a delightful no-bake crust and crowned with a generous dollop of vegan whipped cream. This pie is a symphony of textures and flavors, proving that decadent desserts can also be wholesome and easy to prepare. Say goodbye to oven heat and hello to pure, tropical indulgence!
What Exactly is Chocolate Haupia Pie? A Taste of Hawaii
Chocolate Haupia Pie is a beloved Hawaiian delicacy, a staple on the islands and famously popularized by Ted’s Bakery on Oahu’s North Shore. Traditionally, it features a classic pastry crust, a rich chocolate custard base, and is then crowned with a layer of haupia – a firm, gelatinous coconut milk pudding that’s a cornerstone of Hawaiian cuisine. The entire creation is typically finished with fresh whipped cream, offering a delightful contrast of textures and flavors: rich chocolate, creamy coconut, and light, airy topping.
Haupia itself is a traditional Hawaiian dessert made from coconut milk, often thickened with arrowroot starch or cornstarch. Its subtle sweetness and distinct coconut flavor make it incredibly versatile. When combined with chocolate, it creates a truly magical dessert experience, balancing the deep, bittersweet notes of cocoa with the tropical creaminess of coconut.
While the original version calls for baking a pastry crust, my recipe offers a modern, health-conscious twist. We’re embracing the **no-bake** philosophy, which is particularly appealing during warmer months when the thought of turning on an oven is simply unbearable! This **vegan and gluten-free** adaptation features a wholesome, nutrient-dense crust made from nuts and dates. This not only keeps the dessert accessible for those with dietary restrictions but also adds an extra layer of flavor and texture, perfectly complementing the smooth fillings. This way, you get all the deliciousness of a classic Hawaiian chocolate haupia pie, adapted for a plant-based lifestyle and maximum summer enjoyment.
Essential Ingredients for a Perfect Vegan Chocolate Haupia Pie
Crafting this heavenly **vegan haupia pie** relies on a few key ingredients, each playing a crucial role in achieving its signature texture and flavor. Selecting good quality components will truly elevate your dessert:
- Full-Fat Coconut Milk: This is the heart of your haupia layer. For the creamiest, silkiest haupia, you absolutely must use full-fat coconut milk (or even coconut cream) from a can. Look for brands with minimal additives. The fat content is essential for achieving the right consistency and rich flavor. Avoid light coconut milk, as it will result in a watery haupia that won’t set properly.
- Granulated Sugar: To ensure your haupia layer maintains its beautiful, pristine white color, granulated sugar is the ideal choice. Unlike brown sugar or some unrefined cane sugars, it won’t impart a tint, allowing the natural coconut shade to shine through. You can adjust the amount slightly to your sweetness preference, but the provided measurement strikes a perfect balance.
- High-Quality Dark Chocolate: For the chocolate layer, don’t skimp on quality. Good dark chocolate makes all the difference, providing a deep, robust chocolate flavor that pairs exquisitely with the coconut. I highly recommend using a dark chocolate with a cacao percentage between 50% and 55%. This range offers a lovely balance of bitterness and sweetness, avoiding the overly sweet profile of milk chocolate while still being approachable for those who aren’t fans of very dark chocolate. Chop your chocolate finely for easier melting.
- Non-Dairy Milk: A small amount of non-dairy milk (like almond, soy, or oat milk) is used in the chocolate haupia filling to help achieve the perfect consistency and temper the richness of the coconut milk slightly. Choose an unsweetened variety to control the overall sweetness of the pie.
- Cornstarch: This acts as the primary thickening agent for both the chocolate and haupia layers, giving them their characteristic smooth, custard-like texture. Ensure it’s fully dissolved in cold water before adding to the hot liquids to prevent lumps.
- Nut-Based Crust Ingredients (Cashews, Almonds, Dates, Sea Salt): This easy no-bake crust provides a fantastic base. Cashews and almonds offer a subtly nutty flavor and firm texture when processed. Fresh, soft dates bind everything together naturally, adding sweetness and moisture. A touch of fine sea salt enhances all the flavors. If your nuts are already salted, you can reduce or omit the added salt.
- Vegan Whipping Cream: To top off your pie, a good quality vegan whipping cream is essential. Canned coconut whipping cream (like Nature’s Charm, which I love!) is a fantastic option, but you can also use other commercially available vegan whipped toppings. Ensure your coconut whipping cream is well-chilled overnight to allow the cream to separate and solidify at the top of the can, which is crucial for whipping.
With these carefully selected ingredients, you’re well on your way to creating a truly unforgettable **gluten-free, no-bake vegan chocolate haupia pie** that tastes like a slice of paradise.
Expert Tips for the Best No-Bake Vegan Chocolate Haupia Pie
Achieving the perfect **no-bake vegan haupia pie** is simple, but a few key techniques will ensure a flawless result every time. Follow these tips for a beautifully layered and wonderfully set dessert:
- Chill the Crust Thoroughly: Before adding any warm filling, make sure your nut and date crust is well-chilled in the fridge. A cold crust provides a solid, stable base and helps the first warm layer of chocolate cool down and set more quickly. This also prevents the crust from becoming too soft or crumbly when the warm filling is poured over it. Aim for at least 15-20 minutes of chilling for the crust alone.
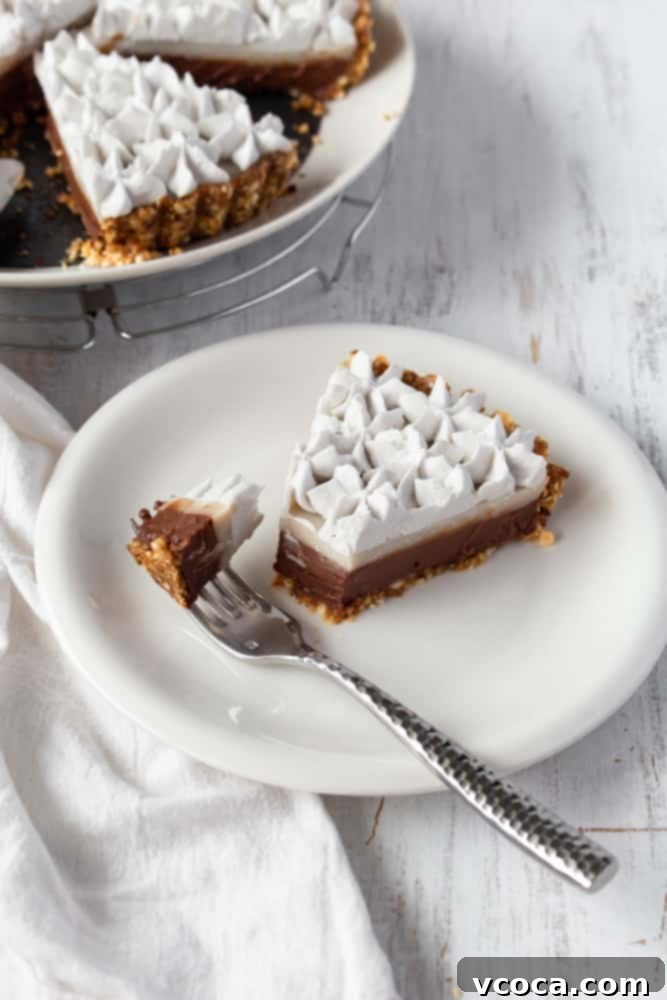
- Chill Each Layer Adequately: Patience is a virtue when making layered no-bake pies! After pouring the chocolate layer into the chilled crust, return the pie to the fridge for at least 10-15 minutes (or even 20 minutes) before adding the haupia layer. This crucial step prevents the two layers from mixing and ensures you get distinct, clean lines between the chocolate and coconut. If you pour the second layer too soon, the warm chocolate will blend with the haupia, leading to a less visually appealing and texturally compromised pie.
- Chill Completely Before Whipped Cream: Once both the chocolate and haupia layers are in place, the pie needs to chill completely and set firm. This will take a minimum of one hour, but for best results, several hours or even overnight is ideal. Attempting to add the vegan whipped cream to a pie that isn’t fully set will cause the cream to melt and create a messy presentation. The cold surface of the pie will help the whipped cream hold its shape beautifully.
- Use Cold Coconut Whipping Cream: If you’re using canned coconut whipping cream, ensure it has been refrigerated overnight (or even longer) before attempting to whip it. This allows the thick cream to separate from the liquid, making it much easier to whip into a light and fluffy topping. Only use the thick, solidified cream from the top of the can.
- Process Crust Ingredients Until Sticky: When making the crust, process the nuts, dates, and salt in a food processor until the mixture forms a fine, sticky crumble that holds together when pressed between your fingers. This ensures a cohesive crust that won’t fall apart when sliced.
- Whisk Cornstarch Thoroughly: Always dissolve cornstarch completely in cold water or non-dairy milk before adding it to hot liquids. This prevents lumps and ensures a smooth, silky custard.
- Constant Whisking for Custard: When heating the haupia mixture, whisk constantly, especially once the cornstarch slurry is added and it begins to thicken. This prevents scorching at the bottom of the pan and ensures an even, smooth consistency without lumps.
- Storage: This **vegan chocolate haupia pie** keeps wonderfully in the refrigerator for up to 3-4 days. Store it loosely covered with plastic wrap or in an airtight container to prevent it from absorbing refrigerator odors.
By following these simple yet effective tips, you’ll master this delightful Hawaiian-inspired dessert and impress everyone with your **no-bake, gluten-free, and vegan pie-making** skills!
Vegan Chocolate Haupia Pie Recipe
Dessert
American, Hawaiian
12 slices
436kcal
Ai Willis
Print
Pin
Rate
Ingredients
Crust
- ⅔ cup cashews
- ⅔ cup almonds
- ⅔ cup fresh dates
- ½ teaspoon fine sea salt skip if using salted nuts
Chocolate Haupia Filling
-
1 can
Chef’s Choice full-fat coconut milk
- ½ cup non-dairy milk
- 1 cup granulated sugar
- 1 cup water
- ½ cup cornstarch
- 6 oz dark chocolate, chopped use good quality chocolate – I prefer 50-55% cacao
-
1 can
Nature’s Charm coconut whipping cream, refrigerated overnight
Instructions
Crust
-
In a food processor, combine the cashews, almonds, fresh dates, and fine sea salt. Process these ingredients until the mixture forms a very fine and sticky crumble. This should take a few minutes, with the mixture eventually clumping together. Firmly press this mixture into the bottom of a 9-inch tart or pie pan, ensuring an even layer. Place the pan in the refrigerator to chill while you prepare the filling.
Chocolate Haupia Filling
-
In a medium saucepan, combine the full-fat coconut milk, non-dairy milk, and granulated sugar. Heat this mixture over medium heat, stirring occasionally. In a separate small bowl, whisk together the water and cornstarch until the cornstarch is completely dissolved and no lumps remain. Once the coconut milk mixture reaches a gentle boil, slowly pour in the cornstarch slurry while continuously whisking. Reduce the heat to low and continue to cook for approximately 3 minutes, whisking constantly, until the mixture thickens to a custard-like consistency.
-
Place the chopped dark chocolate in a heatproof bowl. Pour exactly half of the hot haupia mixture over the chopped chocolate. Let it sit undisturbed for 2-3 minutes to allow the chocolate to melt. Then, stir gently with a spatula until the chocolate is fully incorporated and the mixture is smooth and glossy. Pour this rich chocolate filling evenly into your chilled crust. Smooth the top with an offset spatula for a clean finish and immediately place it back into the fridge to chill for 10-15 minutes, allowing it to firm up slightly before the next layer.
-
Carefully remove the pie from the fridge. Gently pour the remaining plain haupia mixture over the partially set chocolate layer. Smooth the surface once more. Return the pie to the refrigerator for at least one hour, or preferably longer (up to 4 hours or overnight), until both layers are completely set and firm. Before serving, whip the chilled can of Nature’s Charm coconut whipping cream (or your chosen vegan whipped topping) using a hand mixer until light and fluffy. Spread or pipe this whipped cream generously over the chilled pie. Keep the pie refrigerated until you are ready to serve to maintain its perfect consistency.
Love this recipe?
Snap a photo and share tagging @aimadeitforyou or tag #aimadeitforyou!
Nutrition
Serving:
1
slice
|
Calories:
436
kcal
|
Carbohydrates:
44
g
|
Protein:
5
g
|
Fat:
29
g
|
Sodium:
111
mg
|
Fiber:
3
g
|
Sugar:
32
g
Discover More Delicious No-Bake Vegan Desserts
If you’ve fallen in love with the ease and deliciousness of this **no-bake vegan chocolate haupia pie**, you’re in for a treat! The world of no-bake desserts is vast and wonderful, offering delightful options for every sweet craving without the need for an oven. Here are a few more plant-based, no-bake recipes you absolutely must try:
- This Vegan Icebox Cake is incredibly simple to make, requiring no cooking at all. Layers of crispy graham crackers soften into a cake-like texture when combined with rich, creamy vegan filling, creating a nostalgic dessert that’s perfect for any gathering. It’s a true crowd-pleaser and a fantastic way to beat the heat.
- My No-Bake Blueberry Cheesecake Bites are not only adorable but also wonderfully creamy and bursting with fresh blueberry flavor. The secret to their luscious texture? Cashews! These little bites are secretly wholesome and pack a delightful punch of flavor in every mini cheesecake. They’re perfect for portion control or for serving at parties.
- If you’re a fan of classic comfort desserts, you absolutely have to try my Vegan Banana Pudding recipe. It’s ridiculously easy to prepare and tastes just like the beloved Southern classic, but without any dairy or eggs. Serving it in individual jars makes for a charming presentation, ideal for picnics, potlucks, or simply enjoying a sweet moment at home. The layers of creamy pudding, fresh bananas, and vanilla wafers are simply irresistible.
Embrace the joy of effortless dessert making with these and other amazing **no-bake vegan recipes**. They’re perfect for satisfying your sweet tooth, impressing guests, and keeping your kitchen cool!
Disclosure – A heartfelt thank you to Chef’s Choice Foods and Nature’s Charm for generously sponsoring this post! I genuinely adore both their high-quality products and their brand values, and it’s truly exciting to collaborate with them to bring delicious vegan recipes like this to you.
This **no-bake vegan chocolate haupia pie** is more than just a dessert; it’s a celebration of tropical flavors and mindful eating. Whether you’re a seasoned vegan baker or simply looking for an easy, crowd-pleasing treat, this recipe promises to deliver a slice of Hawaiian paradise right to your table. Its creamy texture, rich chocolate, and delicate coconut notes make it an unforgettable experience. So go ahead, whip up this beautiful pie, chill, and enjoy the blissful taste of summer!
