Deliciously Soft & Easy Vegan Gluten-Free Easter Sugar Cookies with Natural Icing
Get ready to bake the most delightful Easter treats this holiday season! These exceptional Easter cookies are renowned for their irresistibly buttery flavor and perfectly soft texture, making every bite a pure pleasure. What makes them even more special is the vibrant, naturally colored icing, crafted with evaporated oat milk, ensuring a smooth and sweet finish. Whether you’re a seasoned baker or just looking for a fun kitchen activity, this recipe for Easter sugar cookies is incredibly easy, making it perfect for involving the kids in the decorating process. It’s an ideal way to create cherished memories while producing beautiful, edible art that caters to various dietary needs without compromising on taste or festivity.

I am genuinely thrilled to share this recipe, made possible through a wonderful collaboration with Nature’s Charm. Their evaporated oat milk is a game-changer for achieving that perfect creamy consistency in both the cookie dough and the delicate icing. Rest assured, all opinions expressed here are entirely my own, born from a passion for creating delicious and inclusive desserts.
This recipe was originally published on April 10, 2022. To ensure you have the best possible baking experience, it was thoroughly updated with new photos and expanded information on March 7, 2024.
Why You’ll Adore These Vegan & Gluten-Free Easter Cookies
These aren’t just any Easter cookies; they’re a celebration in every bite! Here’s why this recipe will become your go-to for the holiday season:
- Dietary Inclusive: Being both vegan and gluten-free, these cookies ensure everyone at your Easter gathering can enjoy a delicious treat without worry. No eggs, no dairy, no gluten, but all the flavor!
- Buttery & Tender Texture: Despite being free from traditional butter and wheat flour, these cookies achieve an incredibly soft, melt-in-your-mouth texture that is surprisingly buttery and satisfying.
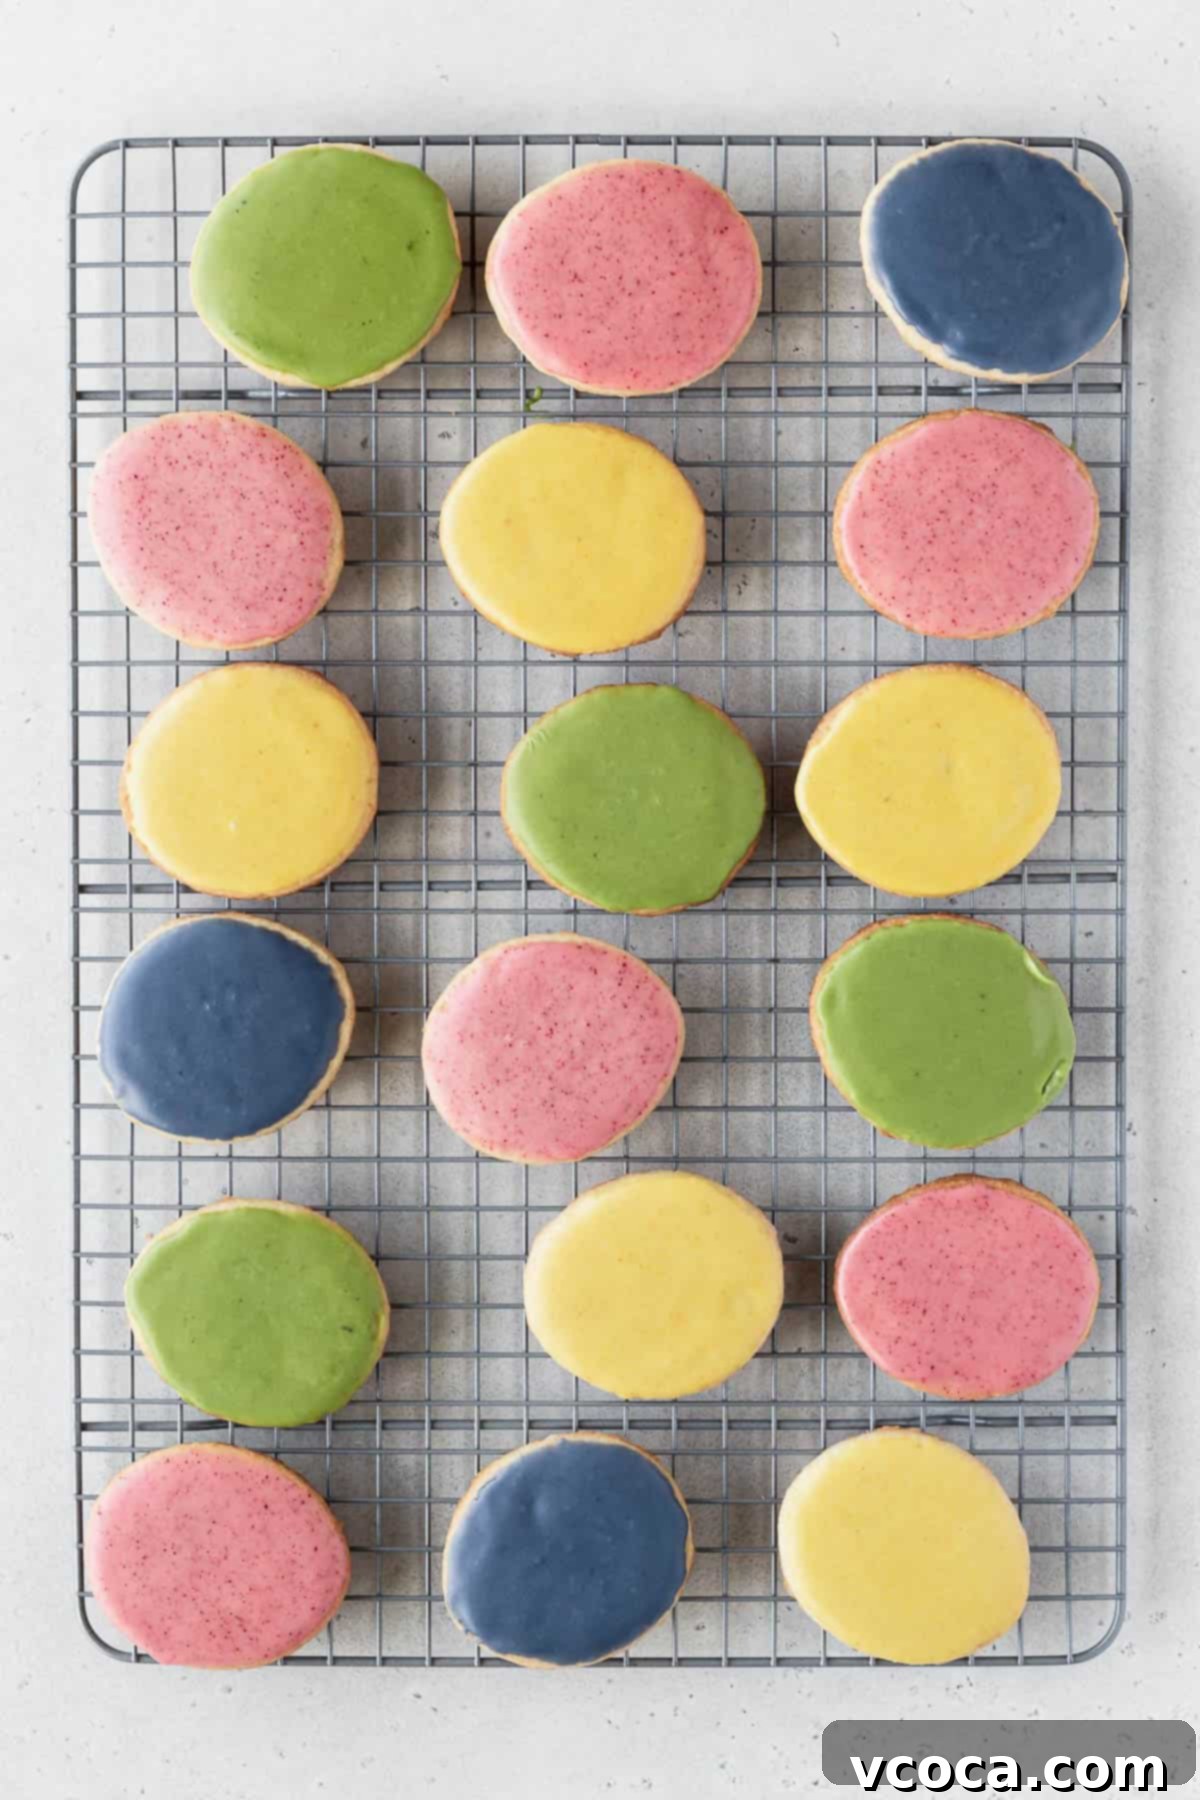
- Vibrantly Decorated with Natural Colors: Say goodbye to artificial dyes! We’re using natural powders to create stunning, safe, and beautiful pastel shades for your icing, making them visually appealing and healthier.
- Kid-Friendly Fun: The process of rolling, cutting, and especially decorating these cookies is perfect for involving little hands. It’s a fantastic way to spend quality time together and encourage creativity.
- Perfect for Easter: Shaped like adorable Easter eggs and adorned with cheerful colors, these cookies are the quintessential holiday dessert, perfect for egg hunts, dessert tables, or gifting.
- Simple & Straightforward: With clear, step-by-step instructions, even novice bakers can achieve impressive results.
Essential Ingredients for Your Easter Cookie Masterpiece
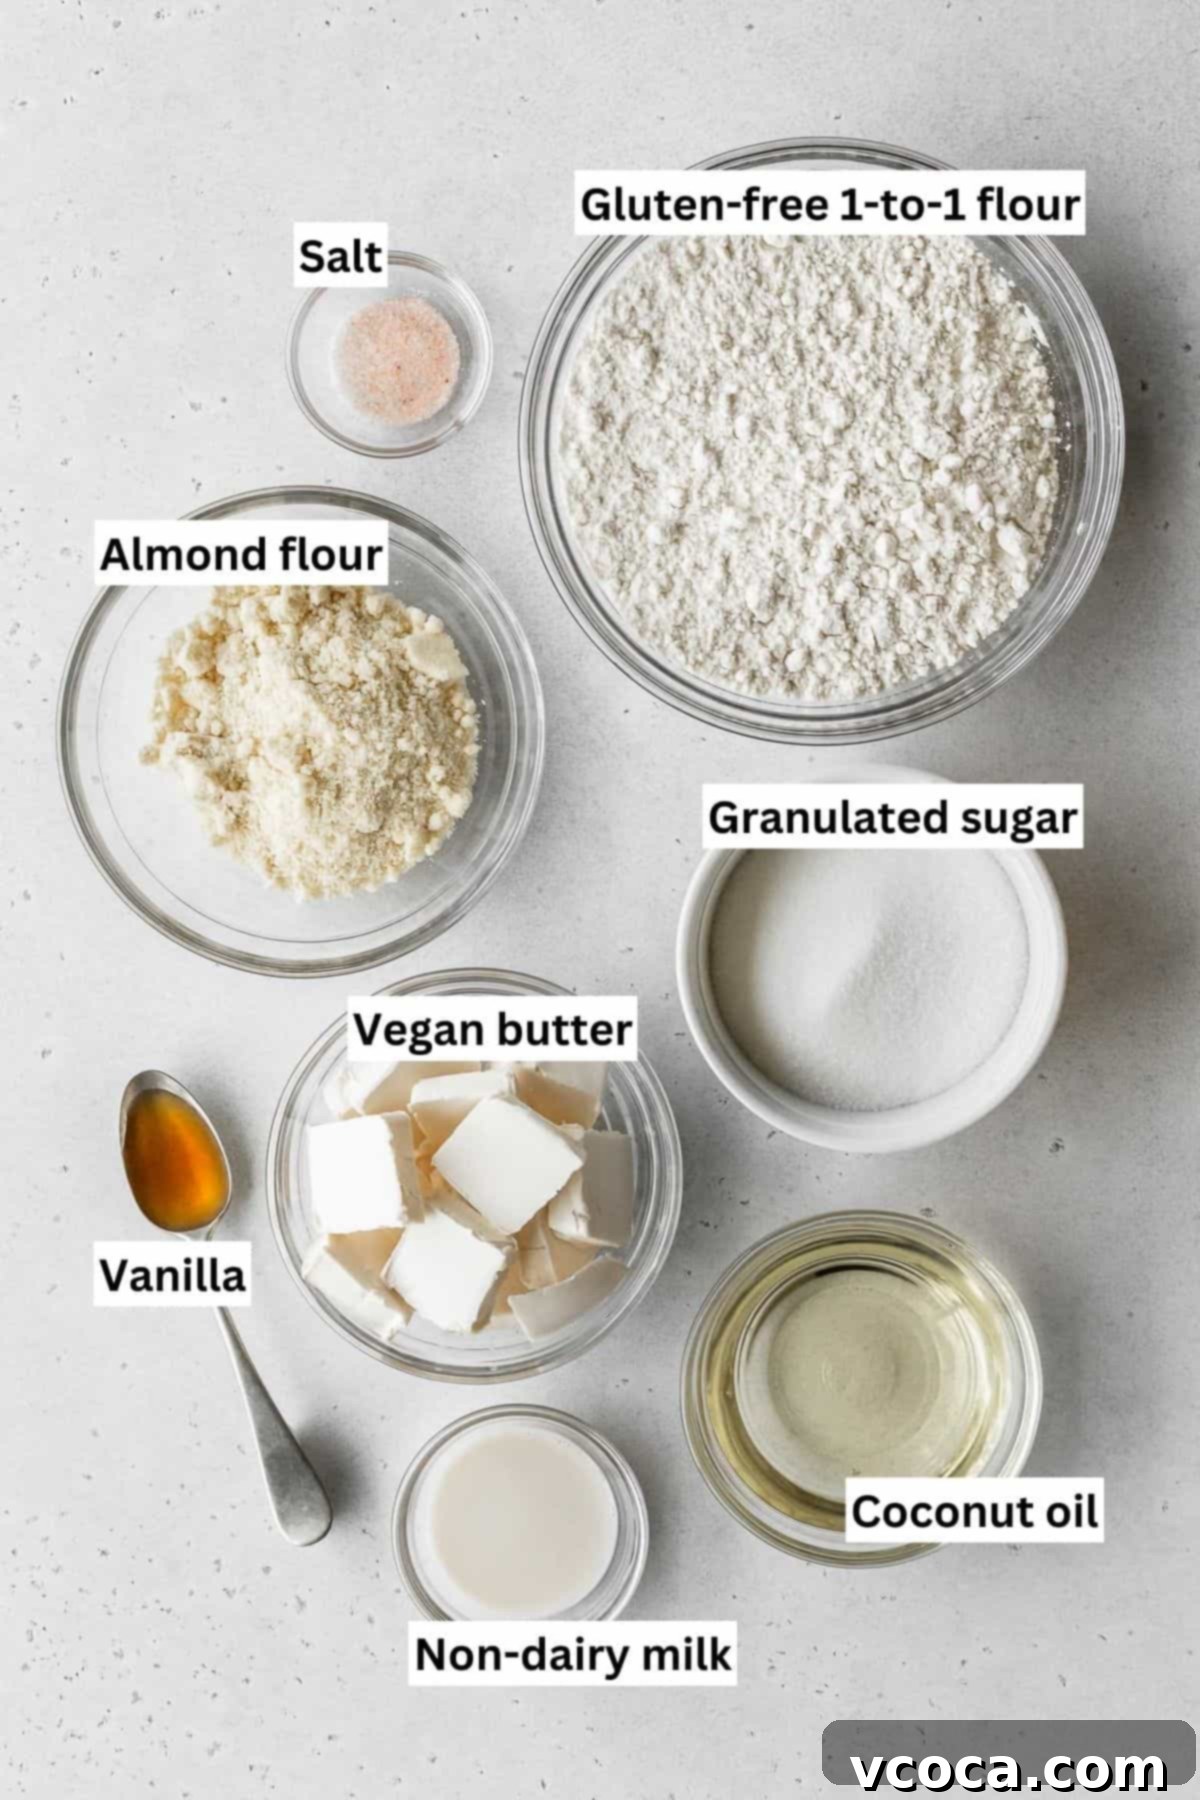
Crafting these delectable vegan and gluten-free Easter cookies requires a thoughtful selection of ingredients, each playing a crucial role in achieving their perfect texture, flavor, and vibrant decoration. Here’s a detailed look at what you’ll need:
- Gluten-Free Flour Blend – The foundation of our cookies! It’s absolutely crucial that your 1-to-1 or measure-for-measure gluten-free flour blend specifically states that it includes xanthan gum. Xanthan gum acts as a binder, providing elasticity and structure that gluten would typically offer, preventing your cookies from being crumbly. If you do not follow a gluten-free diet, you can easily substitute this with an equal amount of regular all-purpose flour for a traditional sugar cookie base.
- Almond Flour – This ingredient is key to achieving that wonderfully tender crumb and adding a subtle depth of nutty flavor to these Easter egg cookies. It works in harmony with the gluten-free blend to create a delicate and soft interior.
- Salt – Often overlooked, a small amount of fine salt is incredibly important to balance the sweetness of the cookies and enhance all the other flavors, making them truly pop.
- Vegan Butter – For the absolute best results, opt for vegan butter sticks rather than the softer butter spreads that come in tubs. Sticks have a higher fat content and firmer consistency, which is essential for proper creaming and dough structure in baking. Make sure it’s softened at room temperature. If you consume dairy, you can substitute the vegan butter with 1 cup (227g) of unsalted dairy butter.
- Granulated Sugar – A non-negotiable in any sugar cookie recipe! It provides the primary sweetness, contributes to the cookie’s structure, and helps achieve a lovely crisp edge while keeping the center soft.
- Nature’s Charm Evaporated Oat Milk – This incredibly versatile ingredient is central to both the cookie dough and the icing. Its creamy texture and mild flavor make it an excellent dairy-free alternative for achieving rich and smooth results. If you can’t find evaporated oat milk, you can use regular full-fat canned coconut milk (the thick cream part) or another plant-based evaporated milk.
- Vanilla Extract – Always use pure vanilla extract, not imitation or artificial varieties. The quality of your vanilla significantly impacts the overall flavor profile of your cookies, imparting a warm, sweet aroma that is irresistible.
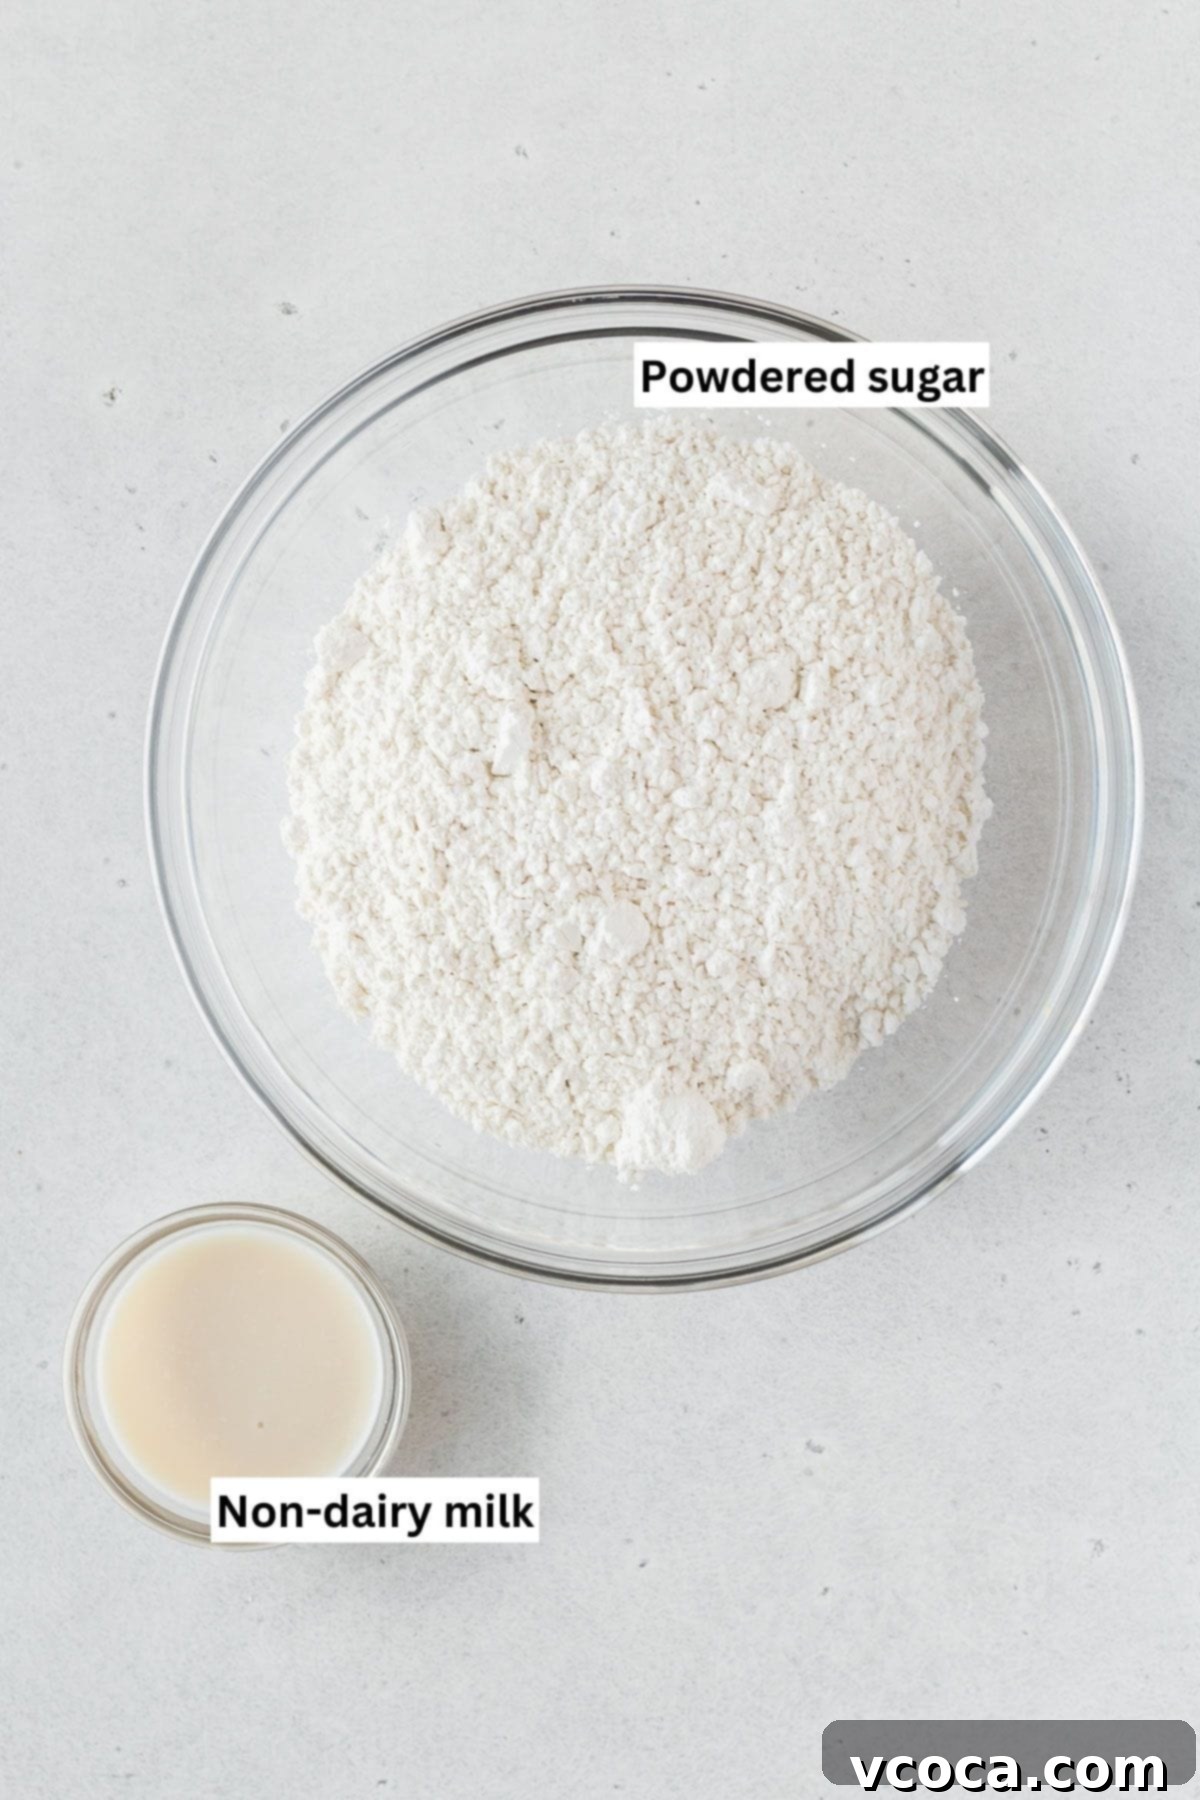
- Powdered Sugar – Essential for creating a smooth, lump-free icing. Be sure to sift it thoroughly before mixing to eliminate any clumps and ensure a perfectly silken glaze for decorating.
- Natural Food Coloring – For a beautiful and healthier alternative to artificial dyes, we’ll create four vibrant colors using natural powders:
- Matcha Powder: For a delicate and earthy green hue.
- Butterfly Pea Powder: Transforms into a stunning blue or purple, depending on the pH.
- Beet Powder: Delivers gorgeous shades of pink or red.
- Ground Turmeric: Provides a cheerful and bright yellow.
These natural options not only add color but also subtle flavor notes and a touch of wholesome goodness to your holiday treats.
Step-by-Step Guide: How to Bake Perfect Easter Sugar Cookies
Follow these detailed steps to create your festive and delicious vegan and gluten-free Easter egg cookies. Precision and patience will ensure the best results!
Step 1: Prepare the Dry Ingredients. In a medium-sized bowl, thoroughly whisk together the gluten-free flour blend, almond flour, and fine salt. This ensures all the dry components are evenly distributed before combining with the wet ingredients. Set this bowl aside for a moment.
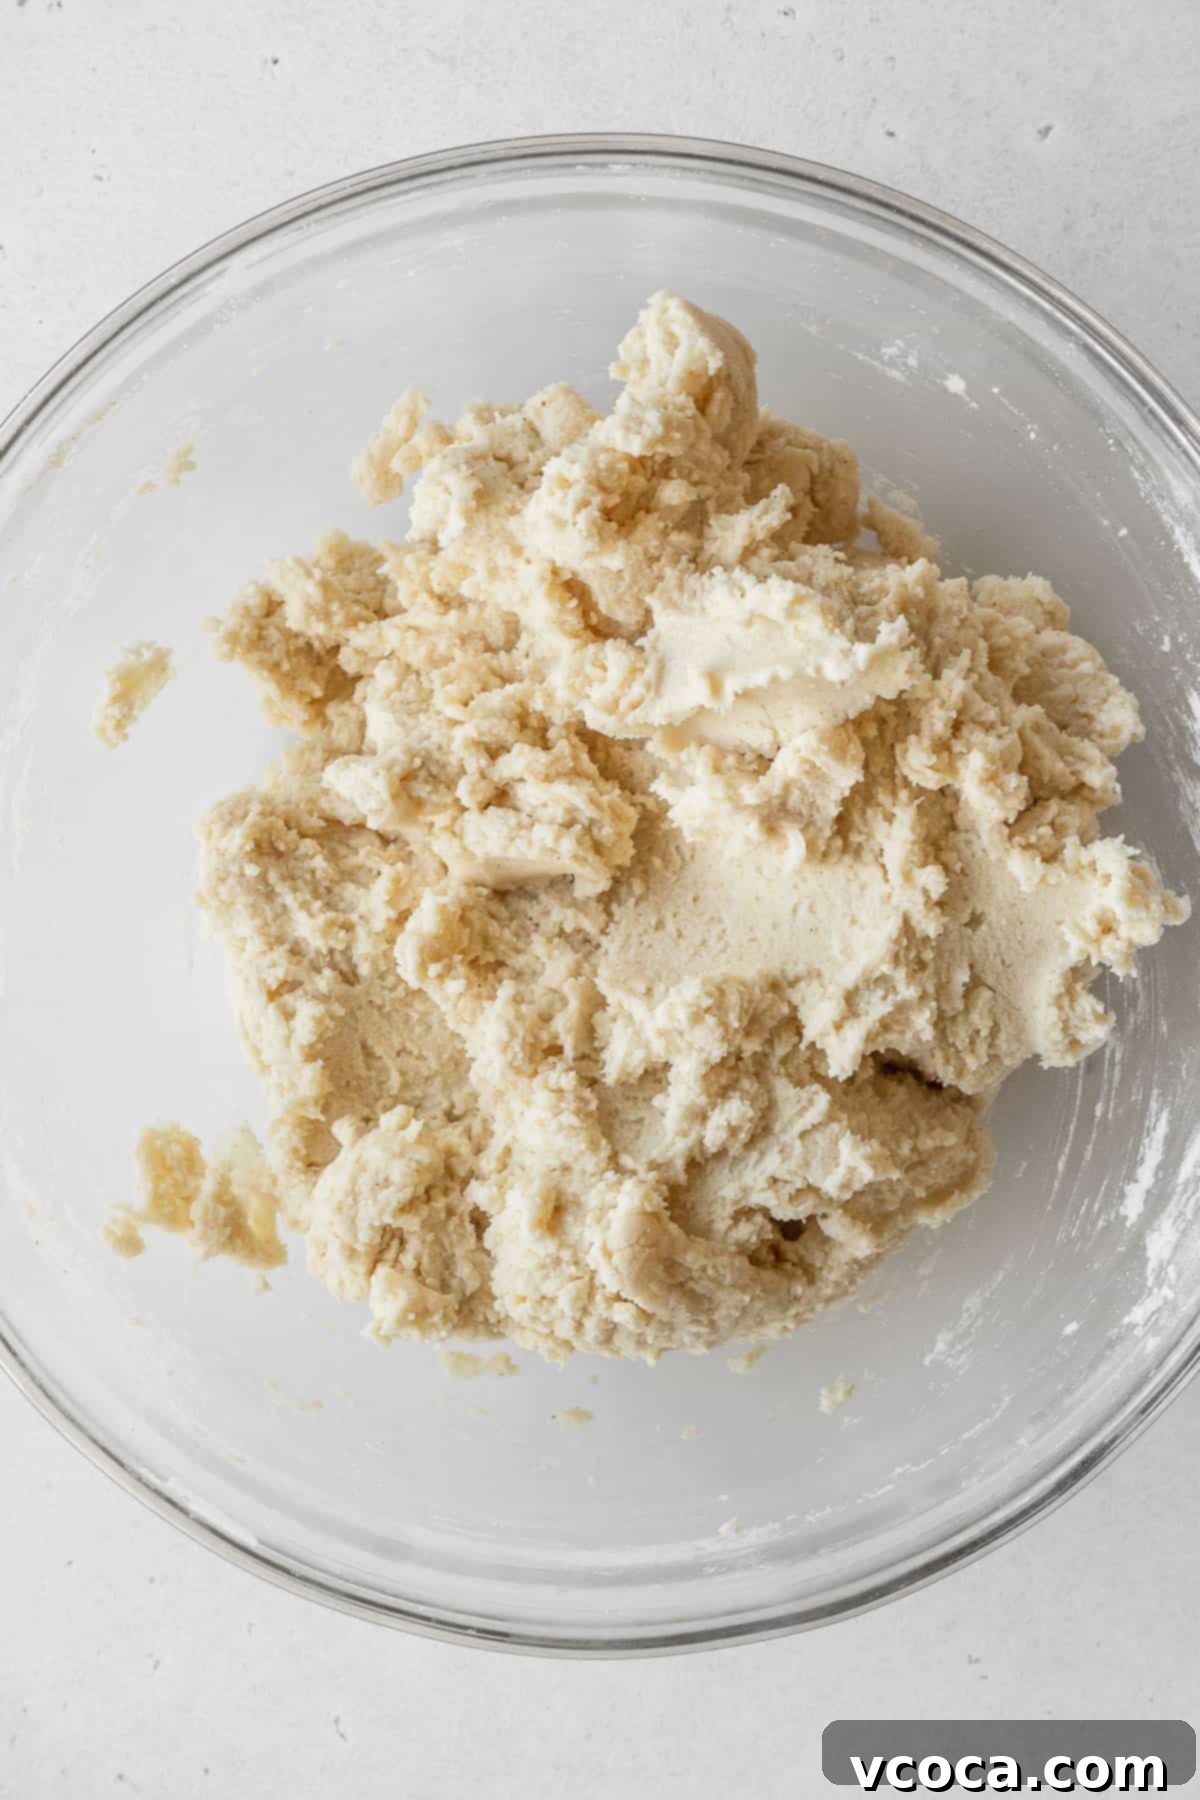
Step 2: Cream the Wet Ingredients. In a large mixing bowl, using either a hand mixer or a stand mixer fitted with the paddle attachment, cream together the softened vegan butter and granulated sugar until the mixture is light, fluffy, and pale in color. This step incorporates air, which is vital for a tender cookie. Next, add the evaporated oat milk and pure vanilla extract, mixing again until just combined. Be careful not to overmix at this stage.
Step 3: Combine and Rest the Dough. Gradually add the prepared flour mixture to the butter mixture, mixing on low speed until you no longer see any dry bits of flour and a cohesive dough forms. Avoid overmixing, as this can lead to tough cookies. Once mixed, cover the bowl with plastic wrap and let the dough rest on the counter for 30 minutes. This resting period allows the gluten-free flours to properly hydrate, resulting in a more manageable dough and a better texture.
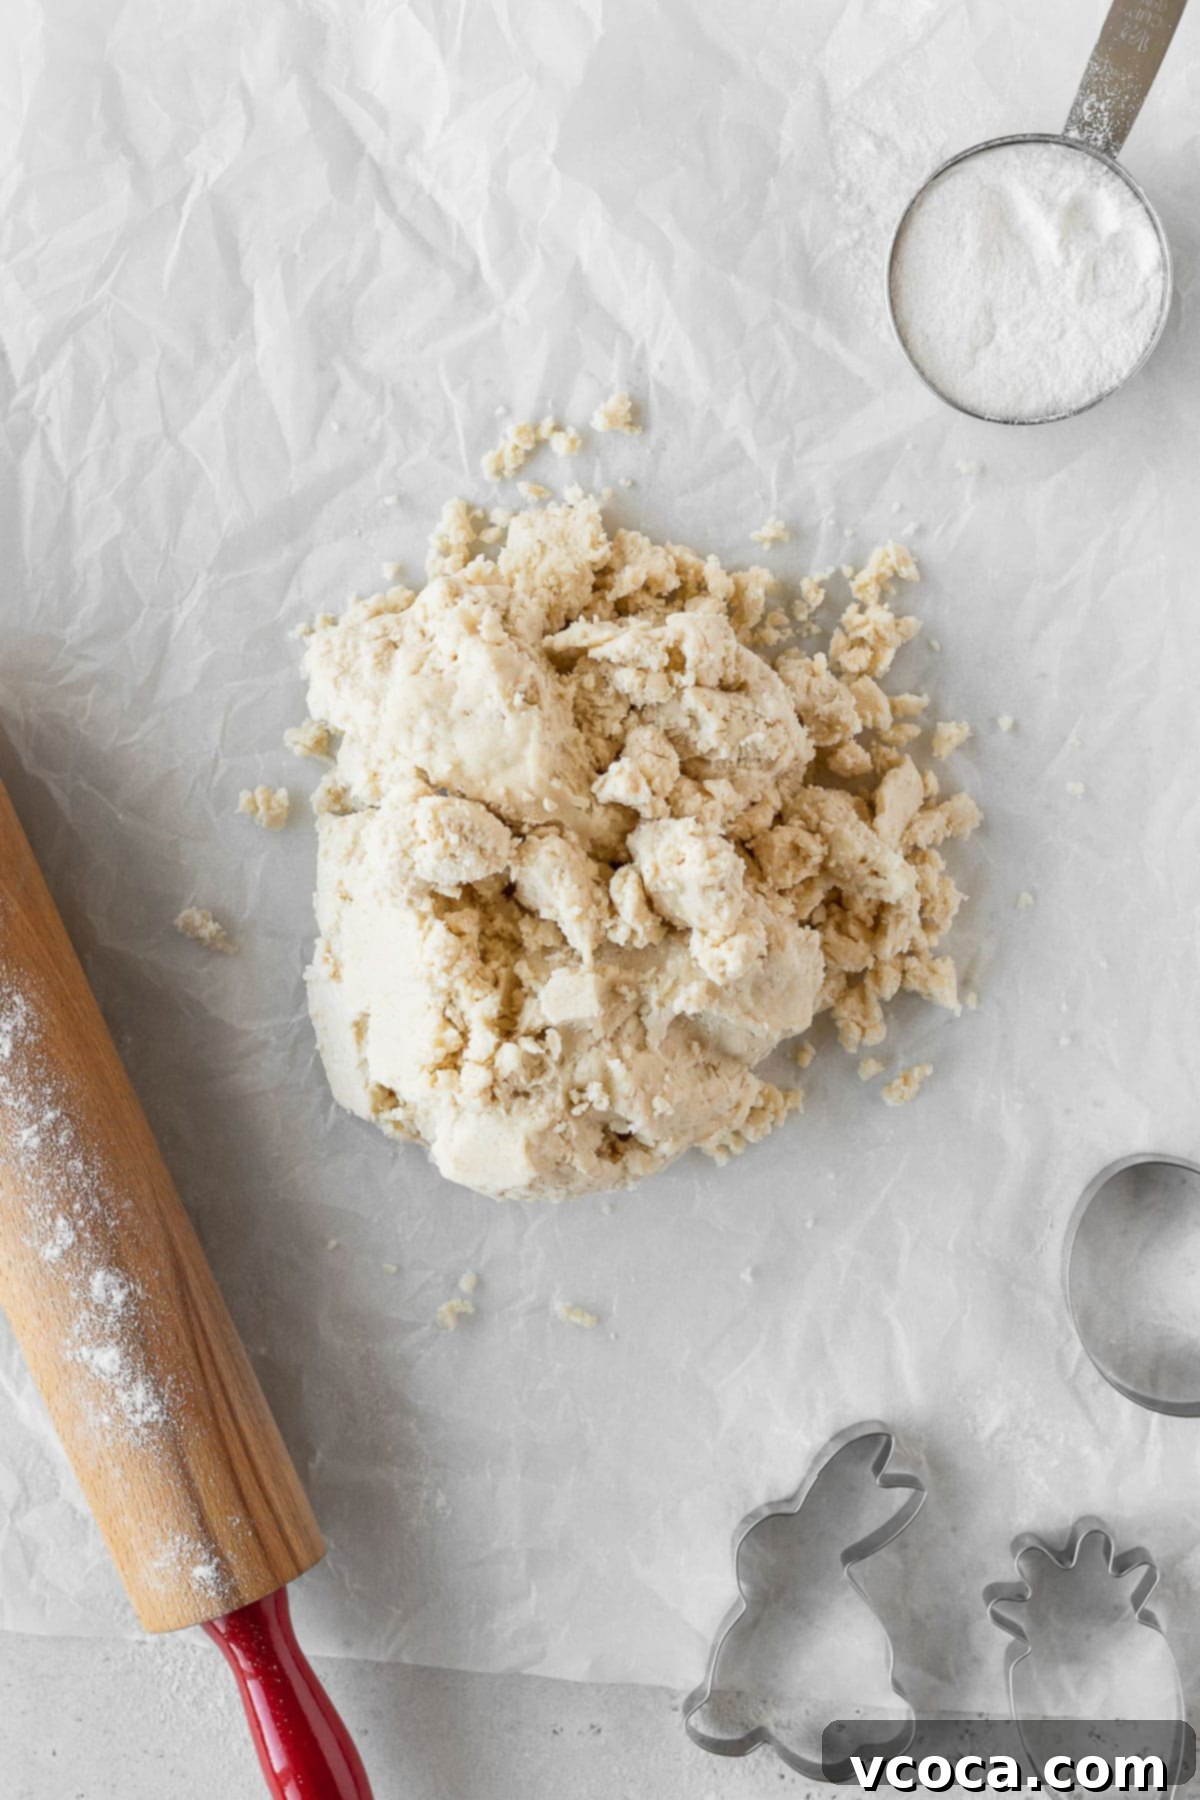
Step 4: Roll and Chill the Dough. Take the rested dough out onto a piece of parchment paper. Place another sheet of parchment paper on top and roll the dough out evenly to a thickness of ¼ inch (½ cm). Rolling between parchment prevents sticking and ensures a consistent thickness, which is crucial for even baking. Carefully transfer the rolled dough (still between the parchment sheets) to a baking sheet and place it in the refrigerator. Chill the dough for at least 30 minutes while you preheat your oven. Chilling is essential to prevent the cookies from spreading too much in the oven and to maintain crisp shapes.
Step 5: Preheat Oven and Prepare Baking Sheet. Preheat your oven to 375°F (190°C). While the oven heats, line a large baking sheet with a fresh piece of parchment paper. This will prevent sticking and make cleanup easier.
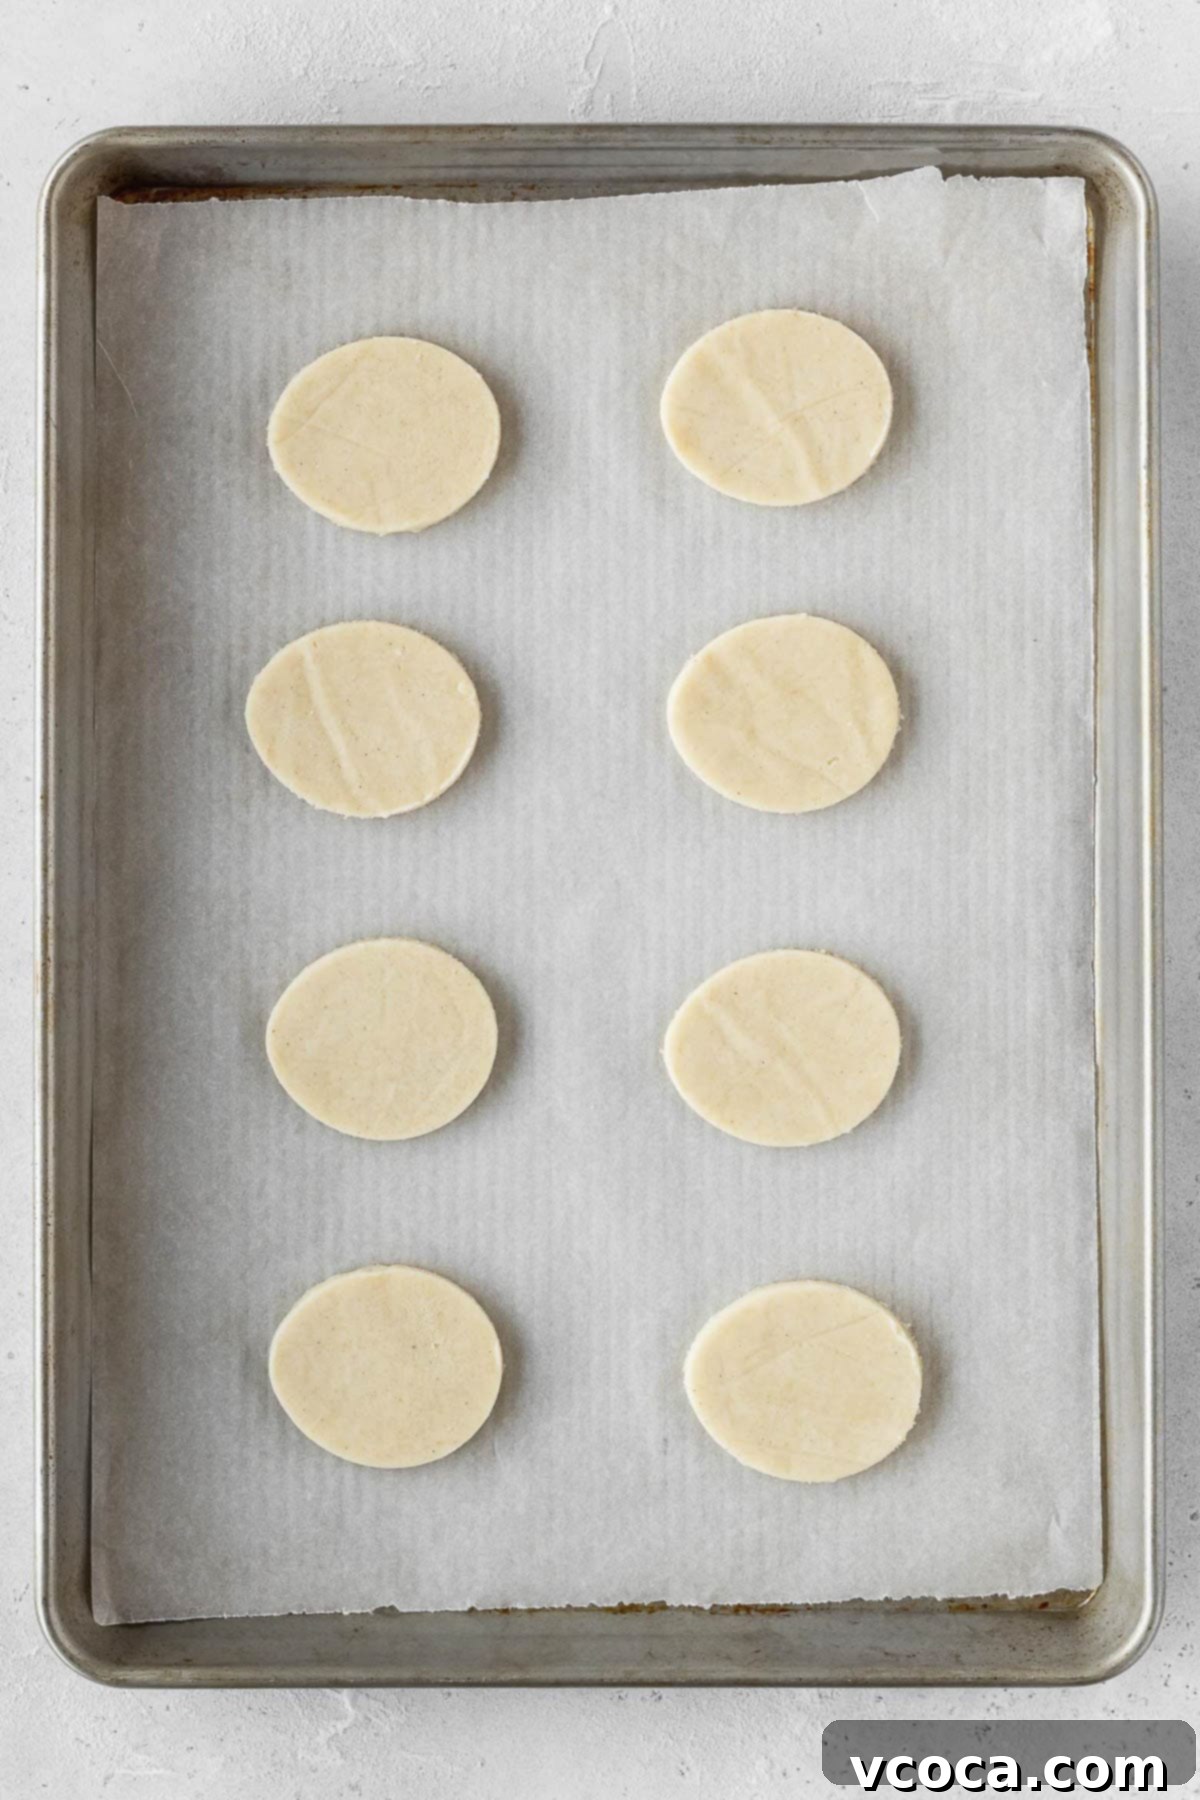
Step 6: Cut Out Cookie Shapes. Retrieve the chilled, rolled-out cookie dough from the refrigerator. Using an egg-shaped cookie cutter (or any festive shape you prefer for Easter), cut out your cookie shapes. Place the cut-out cookies carefully onto the prepared baking sheet, leaving about an inch between each to allow for slight spreading.
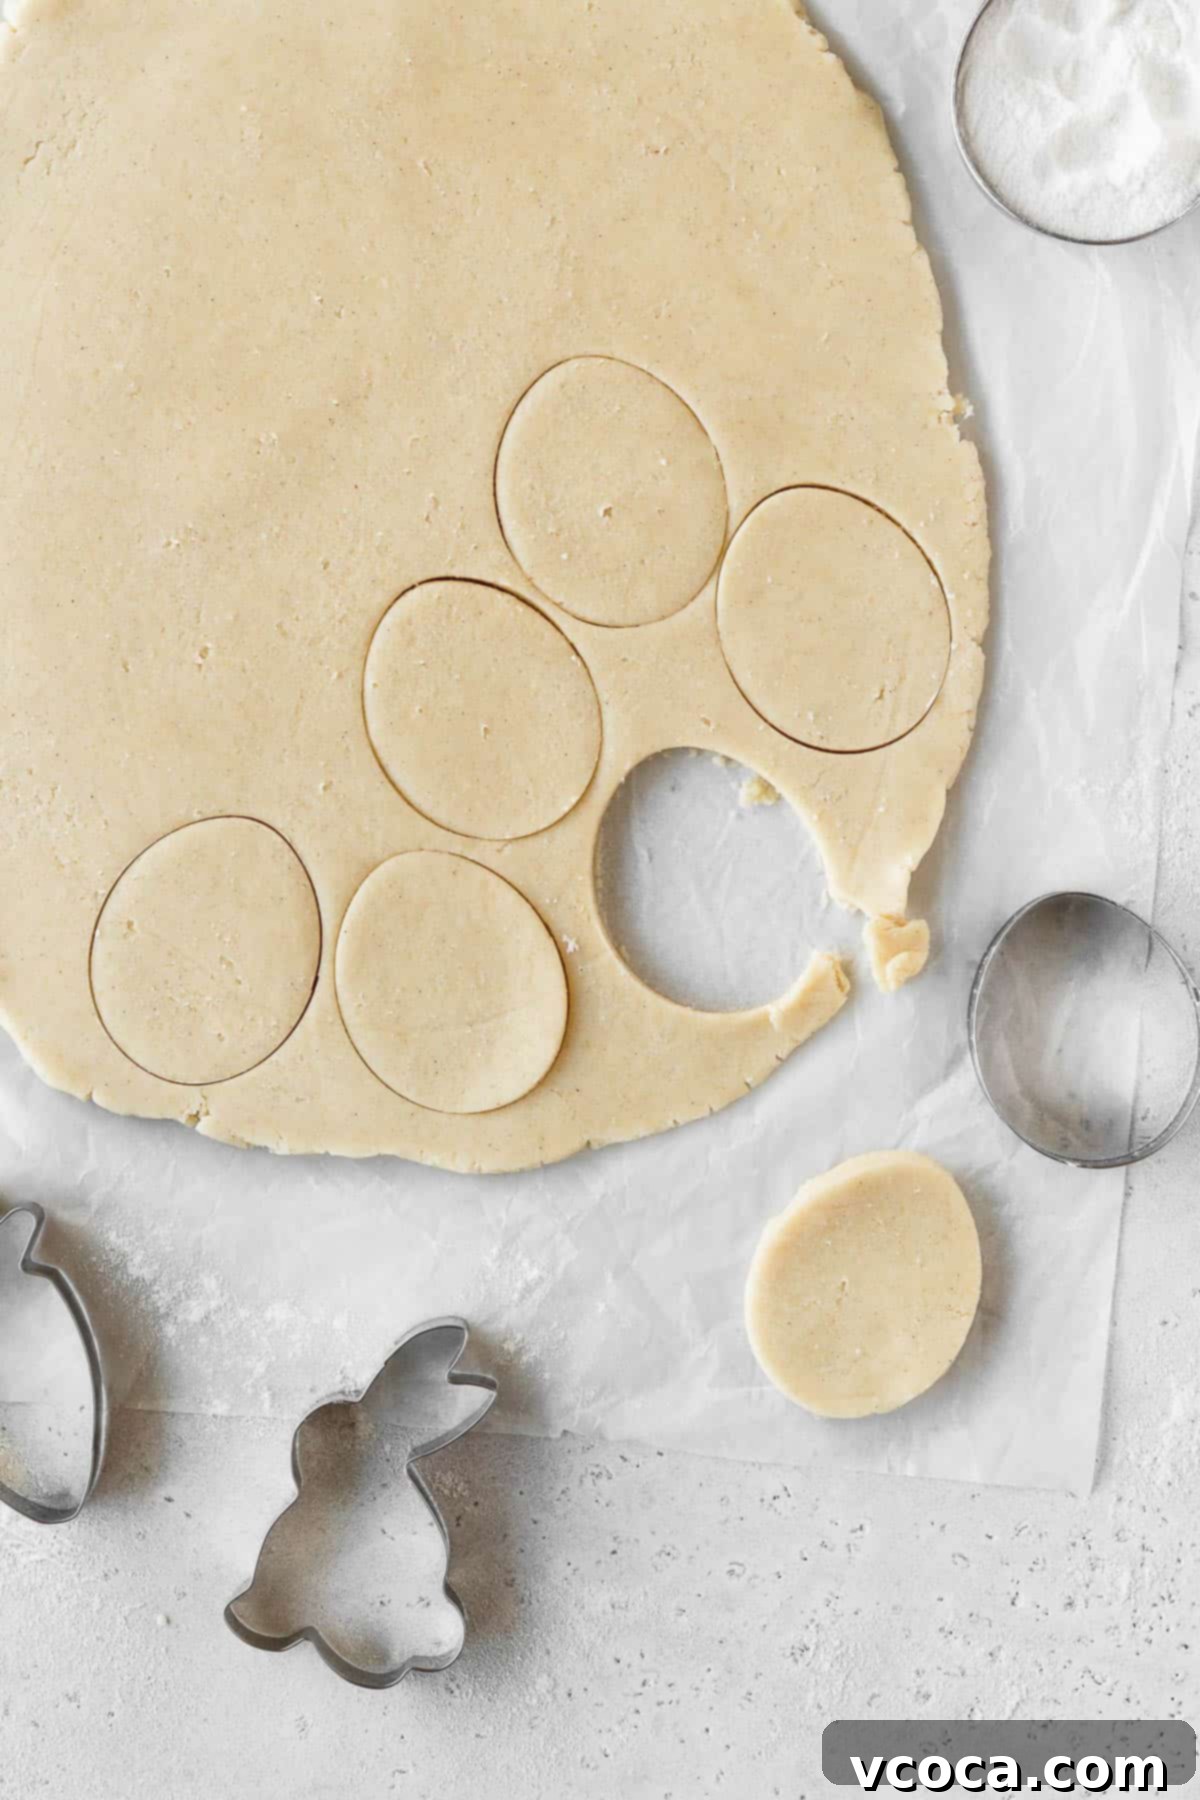
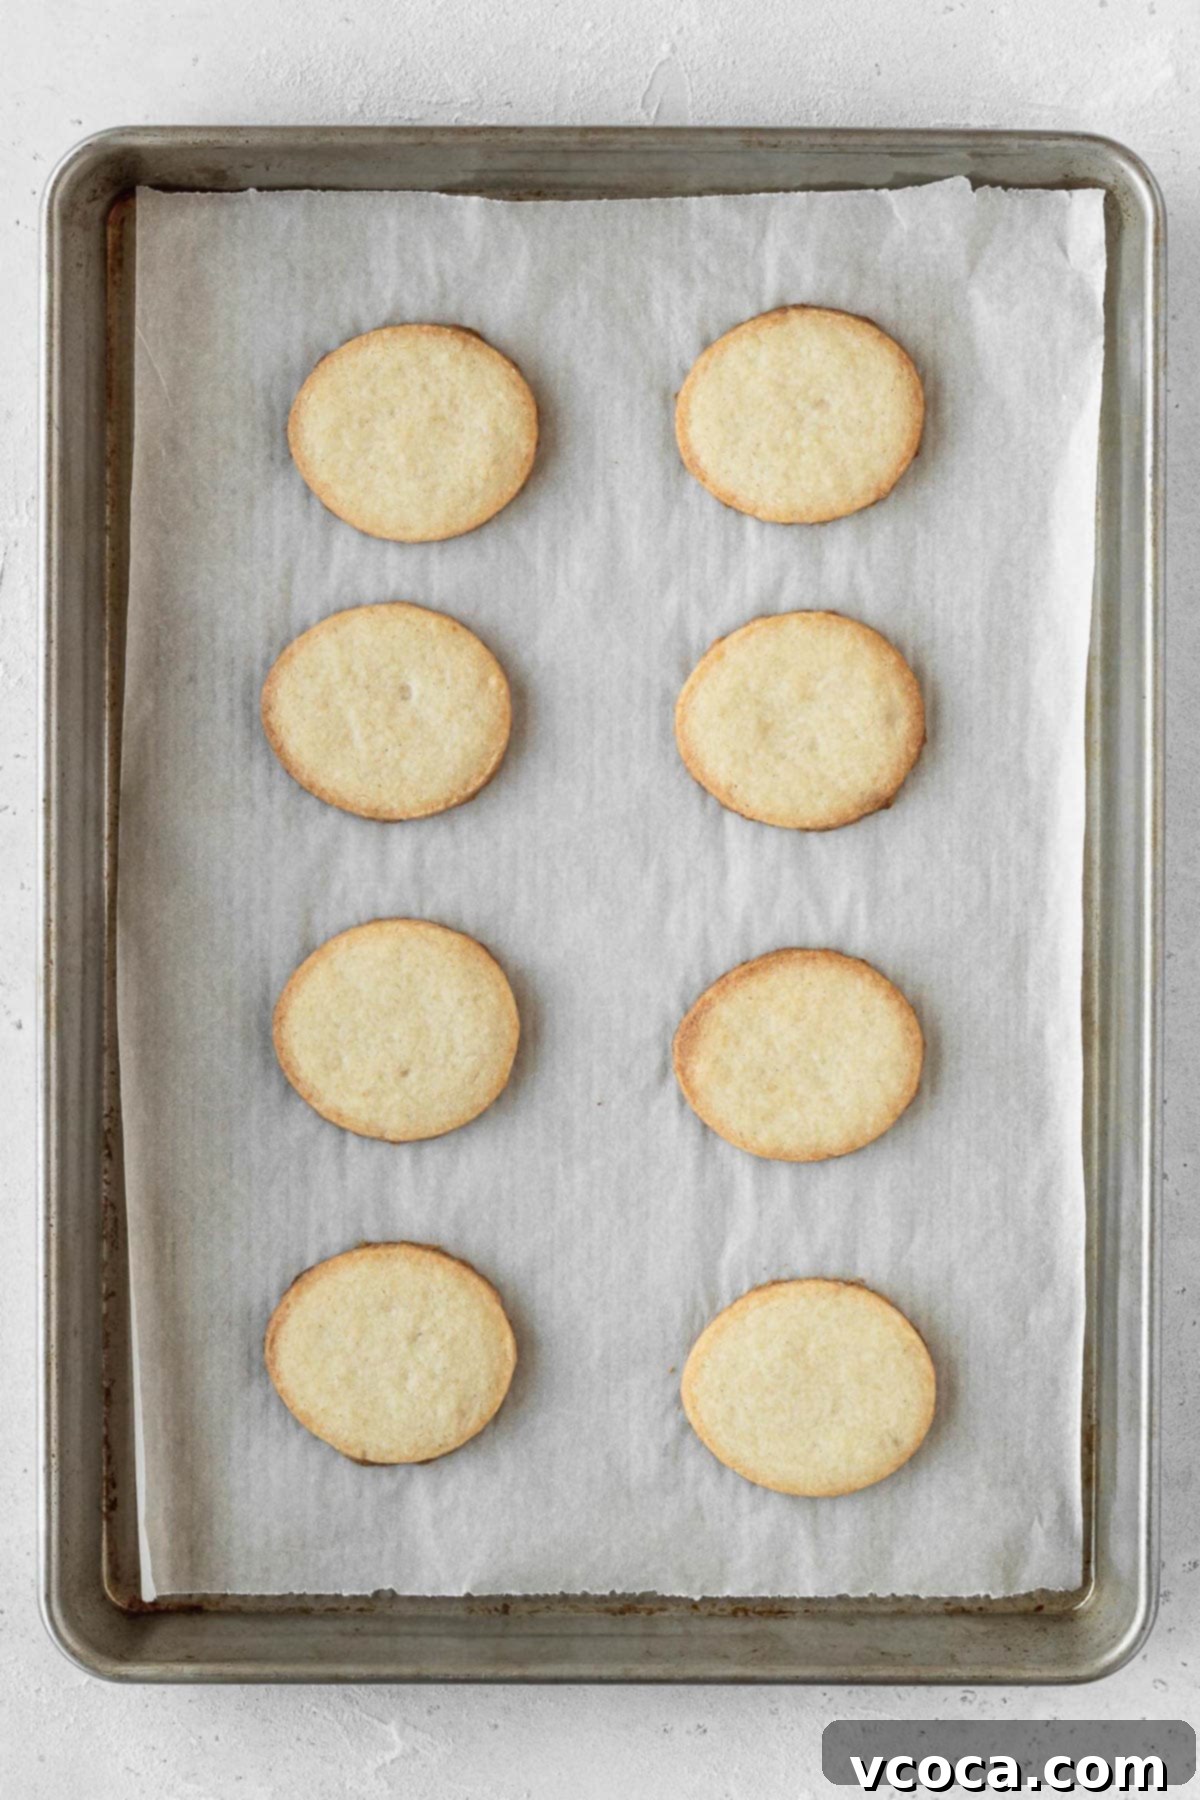
Step 7: Bake the Cookies. Bake the Easter egg sugar cookies for 8-10 minutes. The baking time can vary slightly depending on your oven and the thickness of your cookies. You’re looking for cookies that are set and just barely starting to turn golden at the edges. They should still be soft when you remove them from the oven, as they will firm up as they cool. Gather any leftover cookie dough scraps, gently re-roll them, cut out more shapes, and bake until all the dough is used up.
Step 8: Cool Completely. It’s crucial to let the baked cookies cool completely on the baking sheet for at least 10-15 minutes before attempting to move them. This allows them to fully set and prevent breakage. Once they’ve firmed up, carefully transfer them to a wire rack to finish cooling completely. They must be entirely cool before you begin the decorating process.
How to Decorate Your Beautiful Easter Cookies with Natural Icing
Once your cookies are completely cool, it’s time for the most fun part: decorating! This natural icing recipe is simple to make and perfect for creating festive Easter designs.
Step 1: Prepare the Base Icing. In a small bowl, combine the sifted powdered sugar with the evaporated oat milk. Whisk thoroughly until the mixture is smooth and has a thick but pourable consistency. If it’s too thick, add a tiny bit more oat milk; if too thin, add a little more sifted powdered sugar. The consistency should be similar to that of white craft glue for dipping.
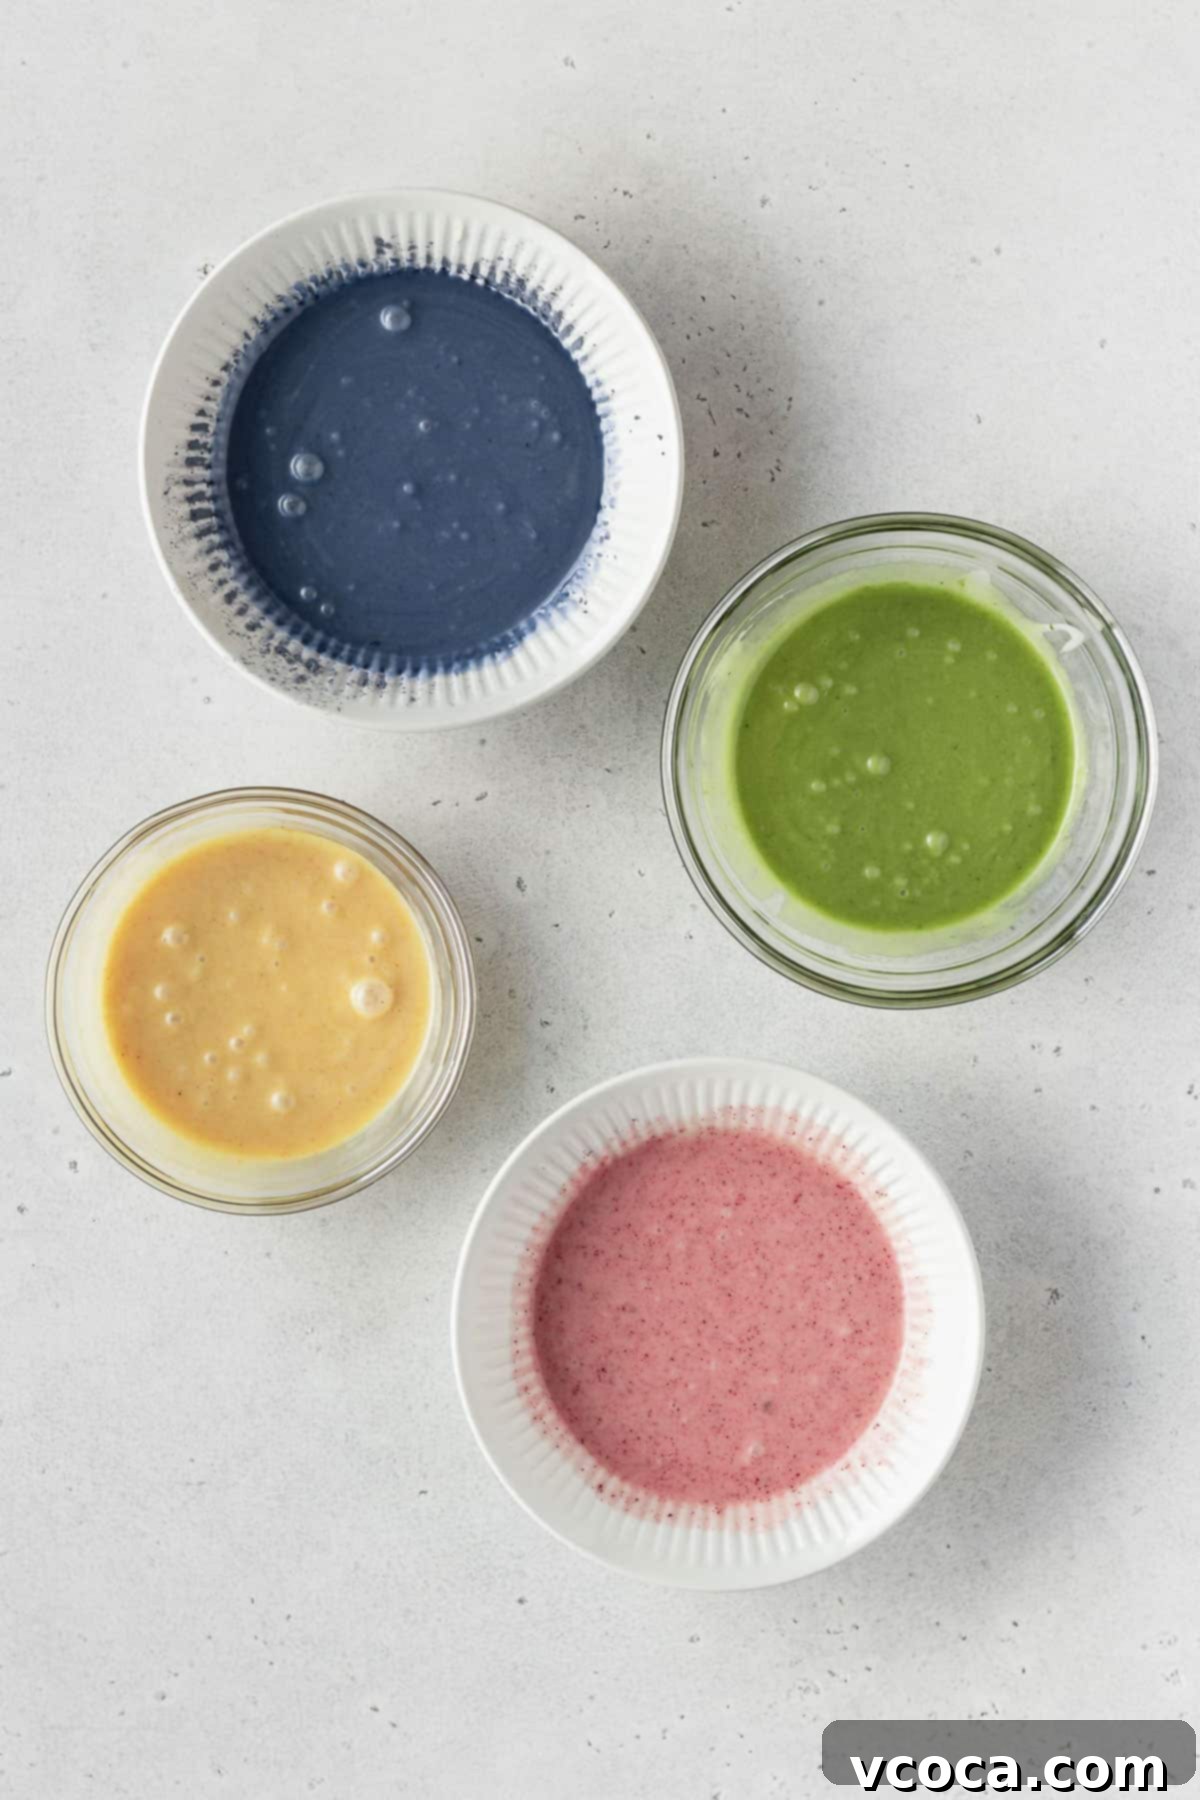
Step 2: Create Your Colors. Divide the prepared icing into several smaller bowls – one for each color you plan to make. Gradually mix in your chosen natural food coloring powders (matcha for green, butterfly pea for blue/purple, beet for pink, turmeric for yellow) into each bowl. Start with a tiny pinch and add more until you achieve your desired pastel shade. Remember that natural colors can be less intense than artificial ones, so embrace the subtle beauty!
Step 3: Dip for Base Coats. Carefully dip the top surface of each completely cooled cookie into one of your colored icings, allowing any excess to drip off. Gently pull the cookie out and immediately place it on a wire rack set over a piece of parchment or wax paper (to catch drips). Allow this base layer of icing to dry and set for at least 15-20 minutes, or until it’s firm to the touch, before adding any further decorations.
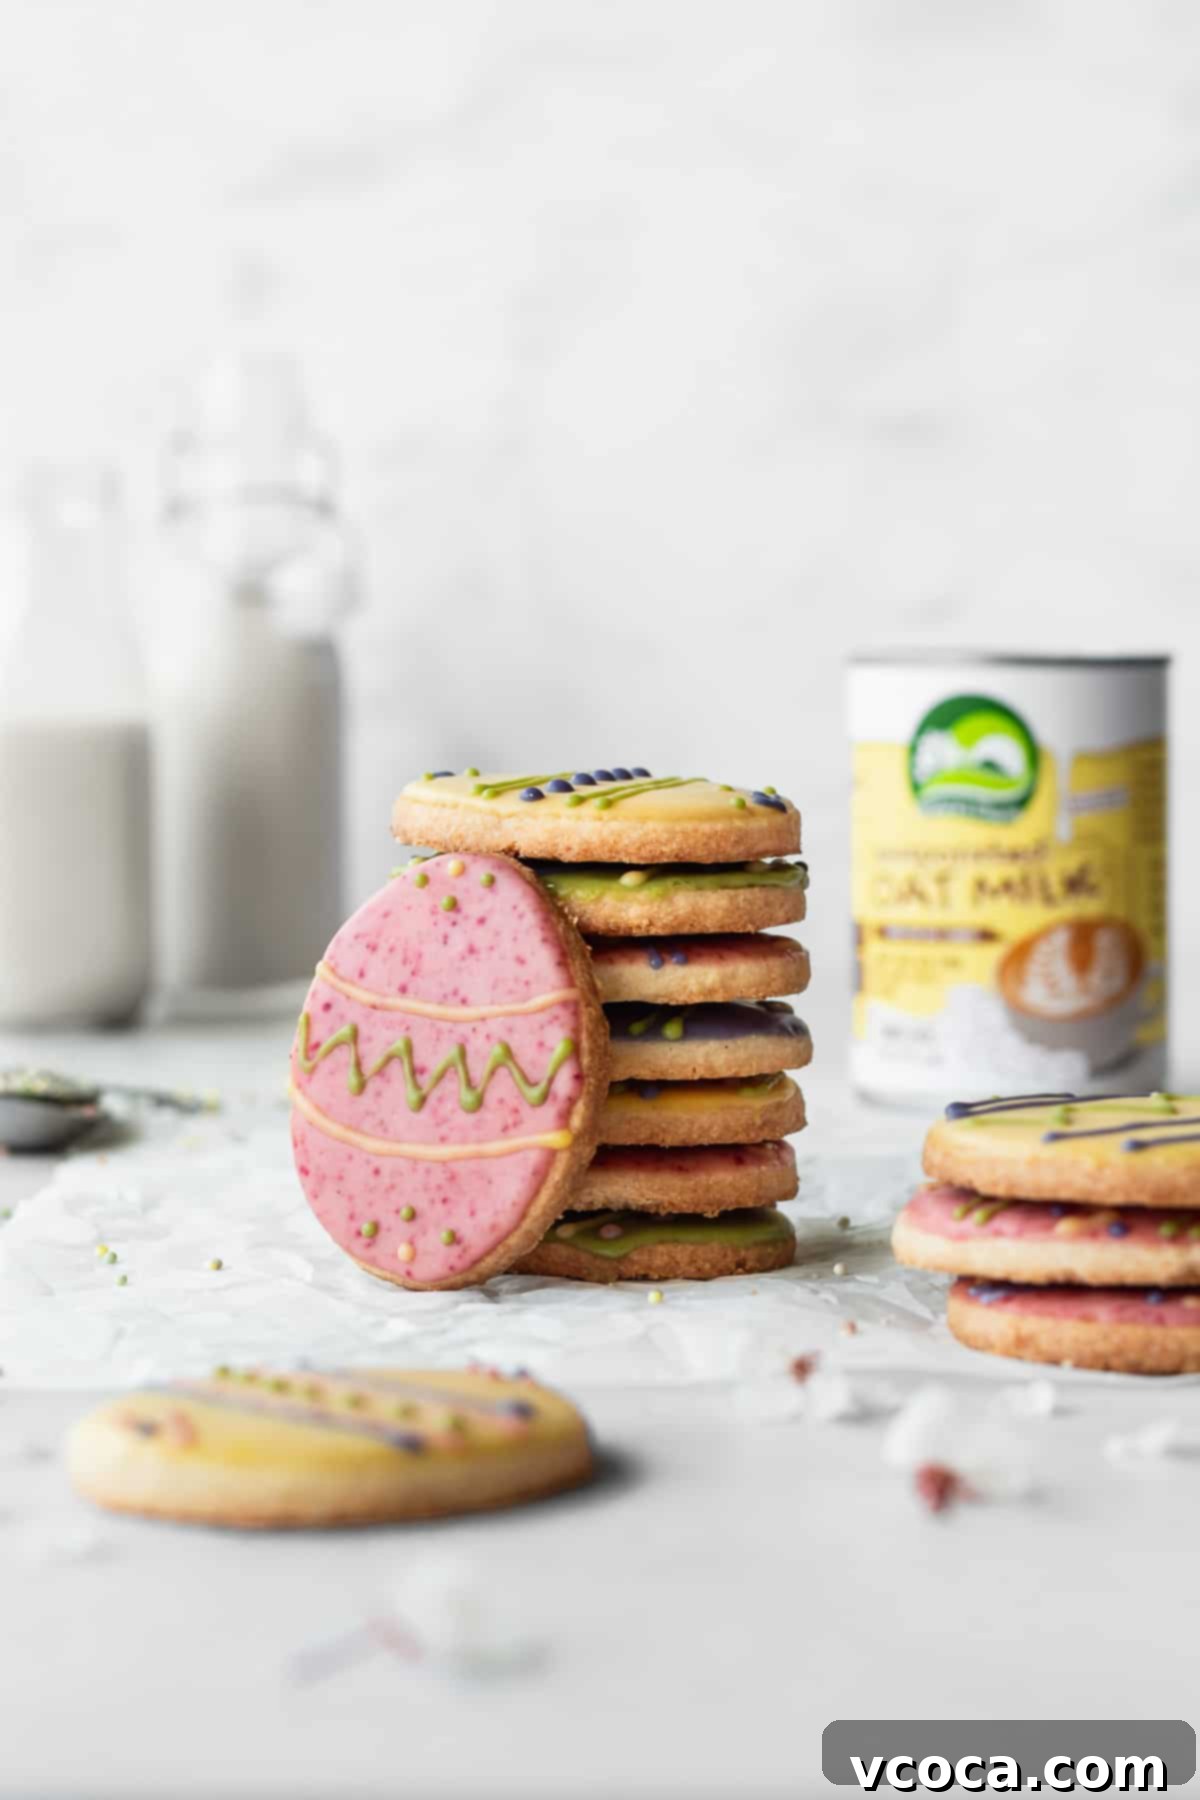
Step 4: Add Decorative Details. Transfer the remaining colored icings into individual piping bags fitted with a small, fine piping tip. Now comes the creative part! Decorate your cookies by drawing intricate lines, playful dots, zigzags, or any other festive patterns you can imagine. For an extra touch of sparkle, you can sprinkle edible glitter or vegan sprinkles on top while the icing is still wet. Let the decorated cookies dry completely on the wire rack for several hours, or even overnight, to ensure the icing hardens fully.
Another fantastic option for decorating these cookies is to frost them with a luscious buttercream, similar to how I prepared these delightful gluten-free sugar cookies. The rich and creamy texture of buttercream offers a different, equally delicious decorating experience!
Expert Tips for Perfect Easter Sugar Cookies Every Time
Achieving bakery-quality Easter cookies is easier than you think with these professional tips and tricks:
- Roll Out Dough Before Chilling for Easier Handling: This is a game-changer! It’s much simpler to roll out soft, room-temperature dough than stiff, cold dough. Once you’ve rolled it to the desired ¼ inch (½ cm) thickness between two sheets of parchment paper, then transfer it to the refrigerator to chill. This way, when you cut out your shapes, the dough will be firm enough to handle and transfer to the baking sheet without losing its perfect egg shape.
- Ensure Cookies Are Completely Cool Before Decorating: Patience is truly a virtue here! If your cookies are even slightly warm, the icing will not set properly; it will melt, smudge, or simply slide right off. For crisp, clean decorations, allow your cookies to cool completely on a wire rack for several hours, or even overnight, before you even think about applying icing.
- Adjust Icing Consistency for Powdered Food Coloring: Natural powdered food colorings (like matcha or beet powder) tend to absorb moisture from the icing more than liquid dyes. If you notice your icing becoming too thick after adding color, gradually add ¼ teaspoon of extra evaporated oat milk at a time, mixing well after each addition, until it returns to its original smooth, dippable consistency.
- Allow Base Color to Set Before Adding Details: For truly beautiful and defined decorations, it’s essential to let the initial dipped base layer of icing dry and set before you start adding lines, dots, or other intricate patterns. Waiting approximately 15 to 20 minutes (or longer, depending on humidity) after dipping will ensure the base is firm enough, so your piped designs remain crisp and don’t bleed into the wet background.
- Fix Icing Imperfections While Wet: Don’t despair if you spot a tiny air bubble or a drip! If you see any air bubbles in your freshly dipped icing, gently poke them with the tip of a toothpick while the icing is still wet to release the air and smooth the surface. If your icing starts to drip down the sides of the cookie, you can easily wipe it away with your finger or a clean damp cloth before it sets, preserving your clean edges.
- Don’t Overwork Re-rolled Dough: When gathering and re-rolling leftover dough scraps, try to handle them as little as possible. Overworking the dough can make it tough. Gently press the scraps together, roll once, and cut out more cookies. You might need to chill the re-rolled dough briefly again if it becomes too warm.
- Use Good Quality Cookie Cutters: For sharp, defined cookie edges, invest in sturdy metal cookie cutters. They cut through the chilled dough more cleanly than plastic ones.

Storage and Freezing Tips for Your Easter Cookies
To keep your delicious Easter cookies fresh and enjoyable for as long as possible, follow these simple storage guidelines:
- Storing at Room Temperature: Once the icing has completely dried and hardened (this can take several hours, or even overnight, depending on humidity), store the decorated Easter cookies in an airtight container. Keep them at room temperature, away from direct sunlight or heat, for 3 to 4 days. Layer them gently with parchment paper in between if stacking to prevent sticking or smudging of the delicate icing.
- Freezing for Longer Freshness: These cookies freeze beautifully, allowing you to prepare them in advance or save extras for later enjoyment. To freeze, ensure the icing is fully set. Then, wrap each cookie individually in plastic wrap to protect them from freezer burn and prevent them from sticking together. Place the wrapped cookies in a single layer in a freezer bag or an airtight freezer-safe container. You can safely keep them in the freezer for up to 3 months. When you’re ready to enjoy them, transfer the frozen cookies to the refrigerator overnight to defrost slowly. This gradual defrosting helps prevent condensation from forming on the icing, which could cause it to become sticky or bleed.
More Delightful Easter Recipes to Explore
Looking for more festive and delicious recipes to complete your Easter celebration? I’ve got you covered with a variety of treats that are perfect for the spring season, many of which are also vegan and gluten-free friendly:
- If you’re enchanted by the Easter egg theme and want more creative dessert ideas, you absolutely must try my whimsical Bird’s Nest Cookies, which are adorable and incredibly easy to make. Or, for a truly unique presentation, bake these charming Cupcakes Baked in Eggshells!
- Craving more Easter cookie inspiration? These vibrant Vegan Lemon Thumbprint Cookies are calling your name! They feature the same wonderfully buttery cookie base as our Easter egg cookies but are filled with a luscious, tangy lemon curd – a perfect complement to spring flavors.
- If you find yourself gravitating more towards cupcakes, you’ll adore these moist and flavorful Easter Carrot Cake Cupcakes, a classic for the season. Alternatively, for a lighter, equally delicious option, try these delightful Dairy-Free Vanilla Cupcakes.
- For those specifically seeking more gluten-free recipes to share on Easter, you’re in luck! Whip up a batch of these comforting Gluten-Free Oatmeal Cookies, indulge in rich and chewy Gluten-Free Brownies, or go all out with a show-stopping Gluten-Free German Chocolate Cake!
Frequently Asked Questions (FAQs) About Vegan & Gluten-Free Easter Cookies
Here are answers to some common questions you might have when making these festive Easter cookies:
Can I make the cookie dough ahead of time?
Absolutely! You can prepare the cookie dough up to 2-3 days in advance. After mixing and rolling it out between parchment paper, wrap it tightly in plastic wrap and store it in the refrigerator. When you’re ready to bake, simply take it out, cut your shapes, and bake as directed. This makes holiday baking much more manageable!
Can I use regular butter and milk if I don’t need them to be vegan or dairy-free?
Yes, you certainly can! If you don’t require the recipe to be vegan or dairy-free, you can substitute the vegan butter with an equal amount (1 cup or 227g) of unsalted dairy butter, softened. For the evaporated oat milk, you can use regular evaporated milk or full-fat dairy milk in the same quantities for both the cookies and the icing. The texture and flavor will still be fantastic!
What kind of gluten-free flour blend is best for these cookies?
For best results, use a high-quality 1-to-1 or “measure for measure” gluten-free flour blend that explicitly states it contains xanthan gum. Popular brands like Bob’s Red Mill 1-to-1 Baking Flour or King Arthur Gluten-Free Measure for Measure Flour are excellent choices. These blends are formulated to mimic wheat flour as closely as possible, ensuring your cookies have the right texture and don’t spread excessively.
How can I prevent my cookies from spreading too much?
Several factors contribute to cookie spread. Firstly, ensure your vegan butter is softened but not melted. Secondly, chilling the dough thoroughly after rolling is critical. A cold dough takes longer to heat up in the oven, allowing the edges to set before the butter melts completely. Lastly, make sure your oven temperature is accurate; an oven that isn’t hot enough can also cause excessive spreading.
How do I achieve vibrant colors with natural food colorings?
Natural food colorings can be less intense than artificial dyes, but they still create beautiful, softer hues. To get vibrant colors, you’ll need to use slightly more powder than you might expect, adding it gradually until you reach the desired shade. For an even more intense color, you can let the colored icing sit for 10-15 minutes after mixing; sometimes the colors deepen over time as the powders fully hydrate.
Can I use other cookie cutter shapes for Easter?
Absolutely! While egg-shaped cutters are classic for Easter, feel free to use bunny, chick, flower, or cross-shaped cutters to add variety to your Easter cookie platter. Just ensure they are similar in size for even baking.
Thanks so much for stopping by and taking the time to explore this wonderful Vegan Gluten-Free Easter Cookies Recipe. I truly hope you enjoyed learning how to make these buttery, soft, and beautifully decorated treats. For even more delicious dairy-free, gluten-free, and/or vegan dessert inspiration, make sure to follow me on Pinterest, Facebook, and Instagram. You can also get all of my newest content, recipes, and helpful tips delivered straight to your inbox by signing up for my email newsletter — I promise not to spam you, just share more deliciousness!

Easter Cookies Recipe
Print
Pin
Rate
Ingredients
Sugar cookies
- 2 cups gluten-free 1-to-1 flour blend
- ½ cup almond flour
- ½ teaspoon fine salt
- 1 cup vegan butter softened at room temperature
- ⅔ cup granulated sugar
- 1 tablespoon Nature’s Charm evaporated oat milk
- 1½ teaspoons pure vanilla extract
Icing
- 2 cups powdered sugar
- 3 tablespoons Nature’s Charm evaporated oat milk
- ⅛ teaspoon matcha powder
- ⅛ teaspoon beet powder
- ⅛ teaspoon turmeric
- ⅛ teaspoon butterfly pea powder
Instructions
Sugar cookies
-
In a bowl, combine the gluten-free flour blend, almond flour, and salt.
-
In a separate bowl, cream together the softened vegan butter and granulated sugar. Add the evaporated oat milk, and vanilla extract, and mix again.
-
Add the flour mixture to the butter mixture and mix until you don’t see any dry bits of flour. Cover and let it rest on the counter for 30 minutes.
-
Take the dough out onto a piece of parchment paper, cover that with another sheet of parchment paper, and roll it out to ¼ inch (½ cm) thickness. Put it in the refrigerator while you preheat the oven.
-
Preheat the oven to 375°F (190°C) and line a baking sheet with parchment paper.
-
Take the chilled rolled-out cookie dough out of the refrigerator and cut out shapes using an egg-shaped cookie cutter.
-
Put them on the parchment-lined baking sheet and bake for 8-10 minutes.Re-roll any leftover cookie dough and bake more cookies, until you have no more cookie dough left.
-
Let them cool completely on the baking sheet before taking them onto a wire rack.
Icing
-
In a bowl, mix together sifted powdered sugar and evaporated oat milk.
-
Separate the icing into smaller bowls and mix in natural food color.
-
Dip in the top surface of each cookie and set on a wire rack to let it dry.
-
Put the rest of the icing in individual piping bags with a small piping tip. Decorate the cookies by drawing lines and dots with the icing.
Notes
Freezing: Wrap each cookie individually and put it in a freezer bag or airtight container. You can keep them in the freezer for up to 3 months. Let the cookies defrost in the refrigerator overnight to avoid condensation.
Nutrition
