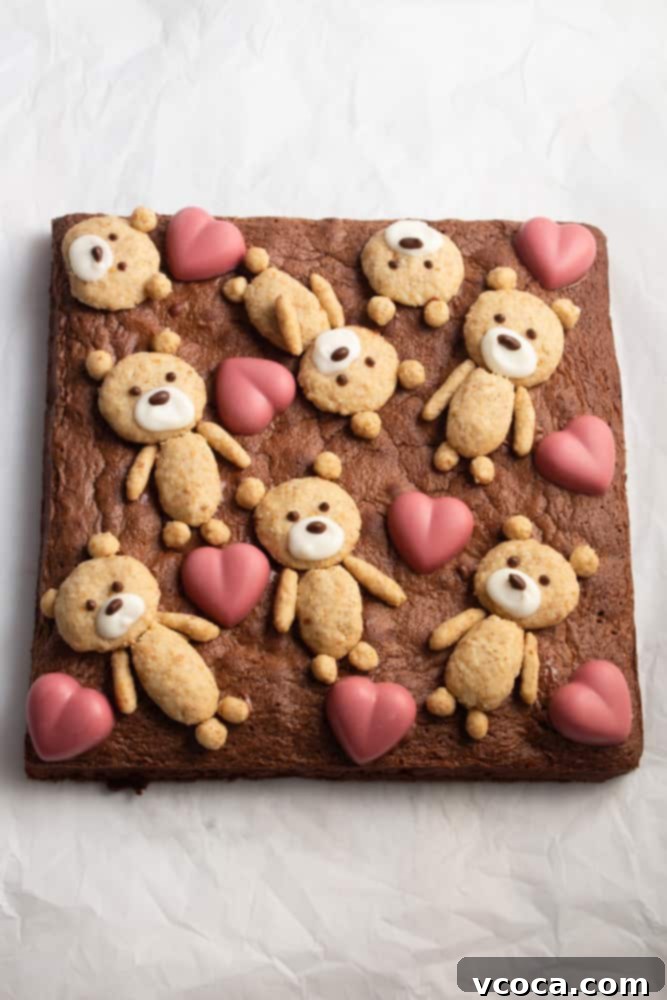
Delightful Teddy Bear Brownies: Your Ultimate Guide to Adorable Valentine’s Day Treats
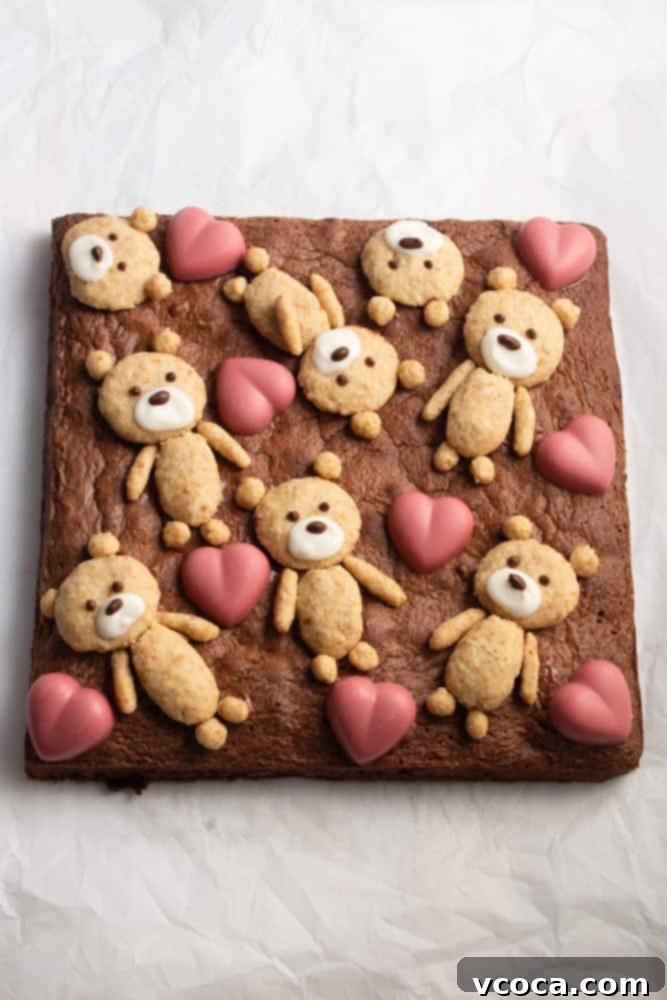
While my heart usually beats for those intensely fudgy, ooey-gooey brownies, I must confess that these charming Teddy Bear Brownies have carved out a special exception in my baking repertoire. They are a true delight: wonderfully **cakey brownies, perfectly complemented by sweet ruby chocolate hearts and the most adorable bears crafted from wholesome oatmeal cookies.** This recipe transforms a classic dessert into an enchanting edible masterpiece, making it ideal for Valentine’s Day, birthdays, or any occasion where a touch of sweetness and whimsy is desired.
If you appreciate a brownie that boasts a lighter, more cake-like texture, then prepare to fall in love! These brownies are utterly delicious on their own, but truly shine when served warm with a generous scoop of creamy vanilla ice cream. The contrast of warm brownie and cool ice cream is simply irresistible, adding an extra layer of decadence to every bite.
For those who remain steadfast members of ‘Team Fudgy Brownie,’ fear not! I have you covered with these equally delightful gluten-free fudgy brownies, ensuring there’s a perfect brownie for every preference.
Crafting Your Adorable Teddy Bear Brownies: A Step-by-Step Guide
Creating these delightful teddy bear brownies is a fun and rewarding process. We’ll break it down into three main stages: baking the cakey brownies, preparing the charming oatmeal cookie bears, and finally, assembling and decorating your edible works of art. Let’s get started on this sweet adventure!
Step 1: Baking the Perfect Cakey Brownies
Our journey begins with the brownie base. For a beautifully textured, cakey brownie, precision in mixing and baking is key.
First, prepare your baking pan. Preheat your oven to 350°F/180°C. Take an 8×8 inch square pan, lightly grease it, and line it with parchment paper, leaving an overhang on two sides. This thoughtful step will make it incredibly easy to lift your cooled brownies out of the pan later. Set this aside for now.
Next, it’s time to melt the chocolate and unsalted butter. You can achieve this using a double boiler, which is essentially a heatproof bowl set over a pot of simmering water, ensuring the bowl does not touch the water. Alternatively, you can use a microwave, heating in 30-second intervals and stirring in between until smooth and fully combined. The gentle heat of a double boiler helps prevent scorching and ensures a silky-smooth chocolate mixture. Once melted and perfectly incorporated, remove the bowl from the heat and allow the mixture to cool completely. This cooling step is crucial; adding hot chocolate to your eggs can scramble them!
While your chocolate mixture cools, we’ll work on building volume and lightness into our brownie batter. In a large mixing bowl, combine the eggs and sugar. Using an electric mixer is certainly an option for speed and ease, but a simple balloon whisk works wonders too, especially if you enjoy a bit of arm exercise! Whisk vigorously until the mixture transforms into a thick, pale, and airy consistency. This aeration process is what contributes significantly to the cakey texture of our brownies, trapping air that will expand during baking.
Once the chocolate mixture has cooled sufficiently, gently stir it into the egg and sugar mixture until just combined. Then, it’s time for the dry ingredients. Sift together the all-purpose flour, rich cocoa powder, and a pinch of salt. Sifting helps prevent lumps and ensures a smooth, even batter. Gently fold these dry ingredients into the wet mixture. Remember, the key to a tender brownie (and avoiding a tough one!) is to mix until *just* combined – overmixing develops gluten, which we want to minimize for this cakey texture.
Pour the luscious batter into your prepared square pan and bake for approximately 20 minutes. Keep an eye on them; a toothpick inserted into the center should come out with moist crumbs, not wet batter. And while those delicious brownies are baking, go ahead and indulge in the universal baker’s right: lick the whisk, spatula, and bowl clean! Surely, I’m not the only one who enjoys a taste of raw brownie batter. It’s a sweet reward for your efforts!
After baking, remove the brownies from the oven and let them cool completely in the pan on a wire rack. Patience is a virtue here; attempting to decorate warm brownies will lead to melted toppings and a messy situation. Once fully cooled, use the parchment paper overhang to lift the entire brownie slab out of the pan. This makes cutting and decorating much easier.
Step 2: Crafting Your Adorable Oatmeal Cookie Bears
With the brownies cooling, it’s the perfect opportunity to bring our little teddy bears to life! These oatmeal cookies are simple to make and add a delightful texture and flavor contrast to the rich brownies.
Preheat your oven to 320°F/160°C and line a baking sheet with parchment paper. In a small bowl, combine the dry ingredients for the cookies: flour, oats (quick-cooking oats work best, or blitz old-fashioned oats lightly in a food processor for a finer texture), light brown sugar, ground flaxseed, and a pinch of salt. The flaxseed not only adds a touch of nuttiness but also acts as a binder. Pour in the water and melted unsalted butter, then mix until a cohesive dough forms. It should be pliable enough to shape.
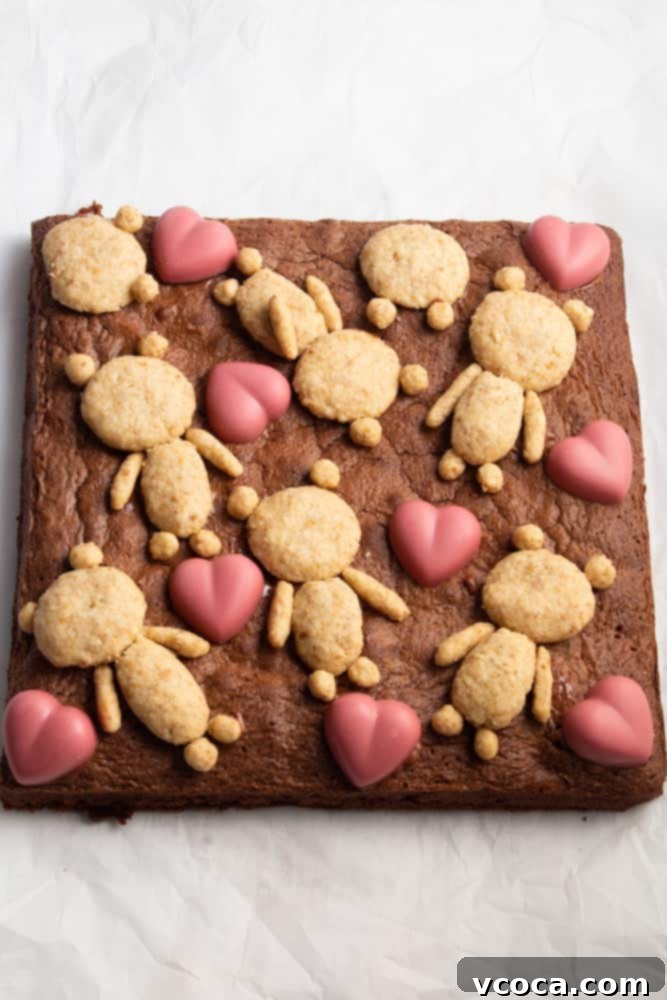
Now for the fun part: shaping your teddy bears! You can let your creativity flow. I found that making 6 full-bodied teddy bears and 2 distinct heads worked perfectly for an 8×8 inch brownie. To shape them, simply roll small balls of dough for the body, slightly smaller balls for the head, and tiny balls for ears and snouts. Gently press them together on the parchment-lined baking sheet to form your bear shapes. Don’t worry about perfection; rustic charm is part of their appeal!
Bake your teddy bear cookies for about 25 minutes, or until they are lightly golden brown and firm to the touch. Once baked, remove them from the oven and let them cool completely on the baking sheet before handling. They will firm up as they cool.

Step 3: Assembling and Decorating Your Masterpiece
With both your brownies and cookie bears cooled, it’s time for the grand assembly! This is where your creation truly comes to life.
Carefully slice your cooled brownie slab into squares or rectangles, depending on how you want to arrange your bears. Then, use a small amount of melted chocolate (dark or white, whichever you prefer!) as an edible “glue” to adhere the oatmeal cookie teddy bears securely to the top of each brownie piece. A dab on the back of each cookie is usually sufficient.
Now, for the charming facial features! Dip a toothpick or a fine-tipped piping bag filled with melted chocolate to draw on simple eyes and a nose for your bears. I kept mine minimalist with just eyes and a nose, but feel free to add a sweet smile, rosy cheeks with edible food coloring, or even tiny buttons on their bodies for extra character. The possibilities are endless when it comes to personalizing your teddy bear treats!
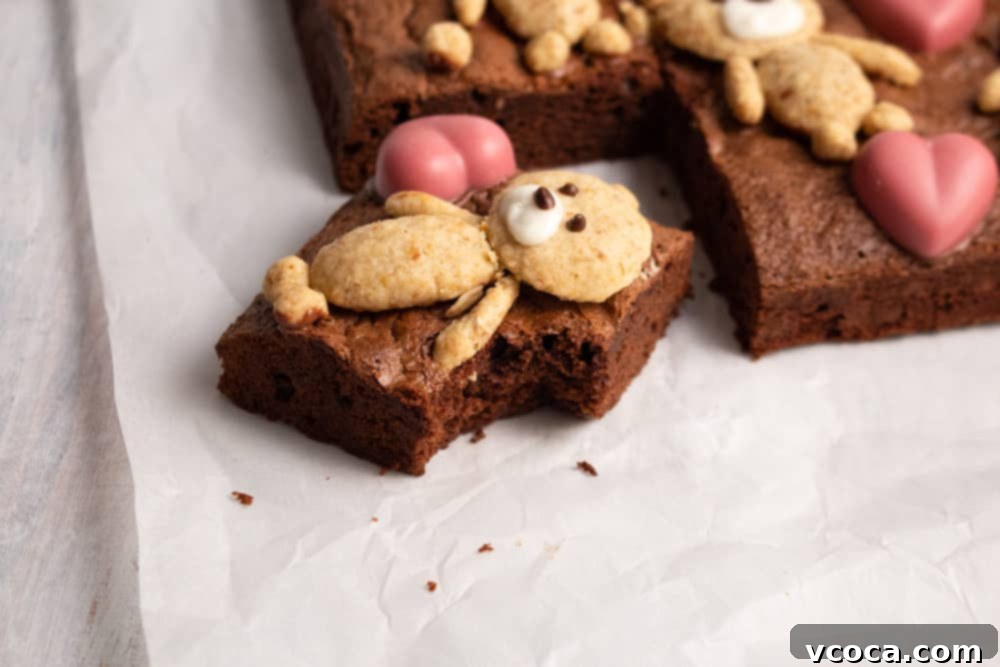
To further enhance the festive and loving theme, I adorned the spaces between my teddy bears with beautiful ruby chocolate hearts. Have you had the pleasure of trying ruby chocolate yet? It’s a fascinating fourth type of chocolate, naturally pink without any artificial food coloring. Its flavor profile is uniquely fruity and subtly tangy, which pairs wonderfully with the richness of dark chocolate brownies and the comforting taste of oatmeal cookies. Its natural rosy hue makes it absolutely perfect for Valentine’s Day or any romantic occasion, adding a pop of color and an intriguing flavor dimension.
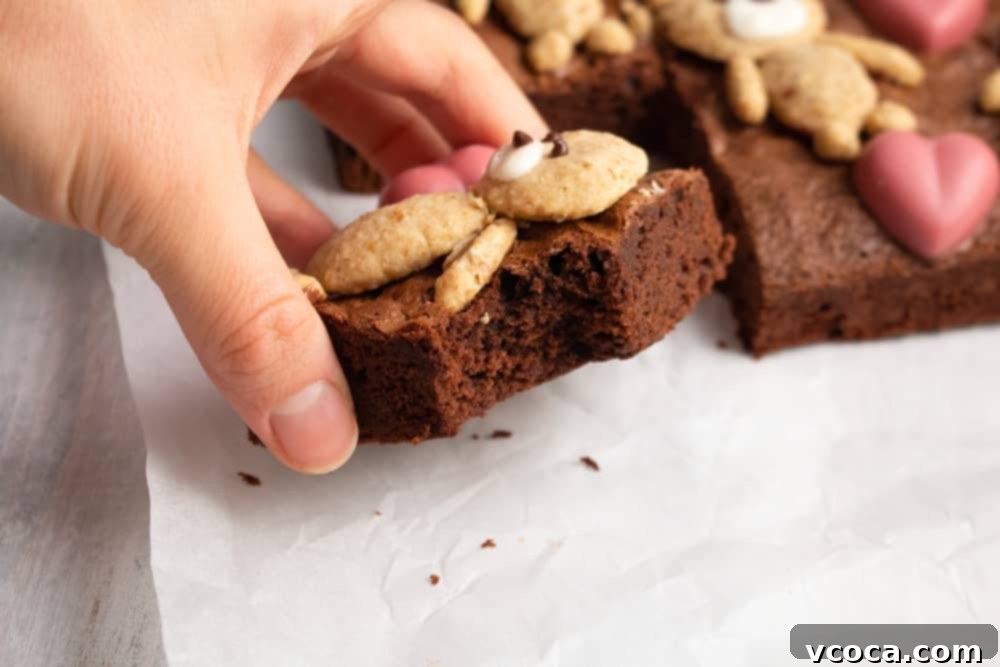
Serving Suggestions and Enhancements
Even though I’ve confessed my allegiance to the fudgy brownie camp, these cakey wonders truly shine when served warm. My absolute favorite way to enjoy them is to gently re-warm a brownie (a quick zap in the microwave for 10-15 seconds does the trick) and top it with a generous scoop of cold vanilla ice cream. The melting ice cream adds a luscious creaminess and the extra moisture I typically crave in a fudgy brownie, transforming this cakey version into an unbelievably amazing dessert experience. The contrast in temperatures and textures is simply divine.
Beyond vanilla ice cream, consider other delightful accompaniments. A dollop of fresh whipped cream, a drizzle of caramel or chocolate sauce, or even a scattering of fresh raspberries or strawberries would beautifully complement the flavors and textures. For a truly indulgent experience, you could also add a sprinkle of sea salt flakes to balance the sweetness.
These teddy bear brownies also make fantastic gifts! Package them individually in clear cellophane bags tied with a pretty ribbon, or arrange them in a decorative box for a thoughtful homemade present. They are guaranteed to bring a smile to anyone’s face!
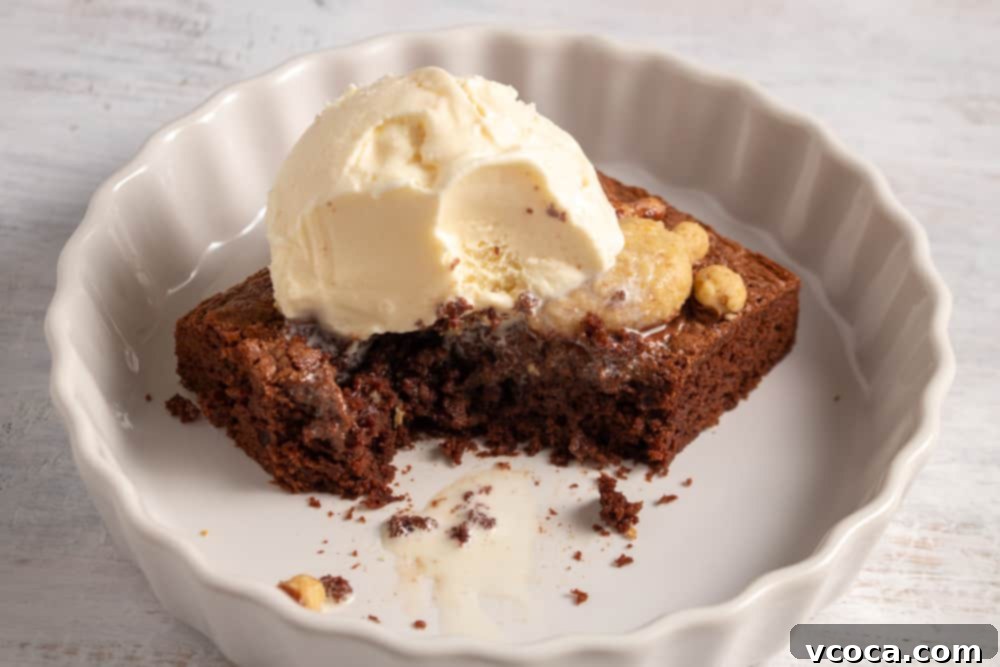
Frequently Asked Questions (FAQ)
To help you perfect your Teddy Bear Brownies, here are answers to some common questions:
- Can I use different types of chocolate for the brownies? Absolutely! While dark chocolate offers a rich, deep flavor, you can experiment with milk chocolate for a sweeter brownie or even a blend of different chocolates. Just ensure it’s good quality baking chocolate.
- Can I substitute the oats in the cookies? For the best texture and flavor, oats are recommended. However, if you’re looking for an alternative, finely ground nuts (like almond flour) could potentially work, but the texture will be different.
- How do I store Teddy Bear Brownies? Store the brownies in an airtight container at room temperature for up to 3-4 days. If refrigerated, they will last longer but may firm up; simply bring them to room temperature or gently warm before serving.
- What if my chocolate seizes when melting? If water or steam gets into your melting chocolate, it can seize (become grainy and thick). To fix this, stir in a teaspoon of vegetable oil or melted butter until smooth again. Prevention is key: ensure your bowl is dry and no steam escapes into the chocolate.
- Can I make the cookies ahead of time? Yes, you can bake the oatmeal cookies a day or two in advance and store them in an airtight container. Assemble them onto the brownies closer to serving time for the freshest results.
I’d love to hear about your baking adventures! Leave a comment below telling me what plans you have for Valentine’s Day, or how your Teddy Bear Brownies turned out!
Looking for another charming dessert that doesn’t require an oven? Impress your Valentine with this delightful icebox cake instead!
Teddy Bear Brownies
Print Recipe
Pin Recipe
Rate Recipe
Ingredients
Brownies
- 4oz / 113g dark chocolate, chopped
- ¾ stick / 85g unsalted butter
- ⅔ cup / 133g light brown sugar
- 2 eggs
- 1 teaspoon vanilla extract
- ½ cup / 60g all-purpose flour
- ¼ cup / 21g cocoa powder
- ½ teaspoon salt
- ½ teaspoon instant espresso powder (optional)
Teddy bear cookies
- ¼ cup / 30g flour
- ¼ cup / 25g oats (quick cooking, or old fashioned oats blitzed a little in the food processor)
- 1½ tablespoons / 19g light brown sugar
- pinch of salt
- 1 teaspoon ground flaxseed
- 2½ teaspoons water
- 2 tablespoons / 28g unsalted butter, melted
Garnish
- dark chocolate, melted
- white chocolate, melted
- ruby chocolate hearts
Instructions
Brownies
-
Preheat the oven to 350°F/180°C. Grease and line an 8×8 inch square pan with parchment paper and set aside.
-
Melt the chocolate and unsalted butter in a double boiler or a heatproof bowl over a pot of boiling water. Once everything is melted and combined, take it off the heat and let it cool completely.
-
While waiting for the chocolate mixture to cool, beat together the eggs and sugar in a large bowl until it turns thick and light in color.
-
Stir in the cooled chocolate and fold in the sifted flour, cocoa powder, and salt. Pour into the pan and bake for about 20 minutes. Let it cool completely before taking it out of the pan.
Teddy bear cookies
-
Preheat the oven to 320°F/160°C and line a baking sheet with parchment paper.
-
In a small bowl, mix together flour, oats, ground flaxseed, sugar, and salt. Pour in water and melted unsalted butter and mix until the dough comes together. Shape the cookie dough into teddy bears and place them on the baking sheet. Bake them for about 25 minutes.
Assemble
-
Use some melted chocolate to stick the teddy bear cookies and chocolate hearts on the brownie.
-
Use some more melted chocolate to draw facial features on the teddy bears.
