The Ultimate Recipe for Fluffy Homemade Lemon Rolls with Zesty Cream Cheese Frosting
It feels like ages since I last shared a new recipe here, and I apologize for the silence! My recent trip to Vancouver to visit Tristan’s family turned into a delightful extended break, during which my blog, admittedly, took a backseat for over a month. But I’m back, refreshed and ready to dive into baking again. And what better way to return than with a bread recipe that’s as bright and welcoming as a sunny day? Especially since I’m currently (and happily) avoiding the monumental task of sifting through the 900+ photos from my trip!

Discovering the Magic of Meyer Lemons
My inspiration for these delightful lemon rolls came from a rare find at my local Japanese supermarket: bags of beautiful Meyer lemons! These aren’t an everyday sight here, so I impulsively grabbed two bags, totaling a dozen lemons, without a specific plan in mind. With Kobe experiencing a sweltering 96.8°F (36°C) and oppressive humidity, my mind immediately drifted to recipes that wouldn’t require my oven to be on for too long, or ideally, not at all. When presented with the choice between a no-bake lemon cheesecake and sticky lemon rolls, Tristan, without hesitation, chose the latter. And what a fantastic choice it was!
These lemon rolls are everything you could wish for in a sweet pastry: incredibly fluffy, richly buttery, and perfectly sweet. But what truly sets them apart is the vibrant, sunny flavor infused from the Meyer lemons. Their unique sweet-tart profile, a cross between a lemon and a mandarin orange, elevates these rolls beyond ordinary. The subtle floral notes and lower acidity of Meyer lemons create a wonderfully balanced taste that is both refreshing and comforting. They transform a simple bread roll into an extraordinary treat, perfect for any time of day.

Crafting the Perfect Dough: Bread Machine or By Hand
The foundation of these incredible lemon rolls is a wonderfully versatile bread dough recipe, the same one I use for my popular strawberry chocolate rolls. Whether you’re a seasoned baker or a beginner, this dough is forgiving and yields exceptional results. If you’re fortunate enough to own a bread machine, your work is cut out for you! Simply add all the dough ingredients into the machine and select the “dough” setting. This magical appliance will take care of the kneading for about 10 minutes, allow a brief 10-minute rest, knead again for another 10 minutes, and then provide the ideal environment for the dough to rise for 30 minutes. It’s truly a set-it-and-forget-it method, allowing you to sit back and relax while the machine does all the heavy lifting.
But fear not if you don’t have a bread machine or aren’t planning to purchase one soon! This soft, rich dough can absolutely be made by hand or with a stand mixer. The key difference when working without a bread machine is to first activate your active dry yeast. Warm your milk to about 105-115°F (40-46°C) – it should feel comfortably warm, not hot. Sprinkle the yeast over the warm milk and let it sit for about 5-10 minutes until it becomes foamy. This indicates your yeast is active and ready to work its magic. Then, combine the activated yeast mixture with the rest of your dough ingredients in a large bowl or the bowl of your stand mixer. Knead the dough for approximately 8-10 minutes until it is smooth, elastic, and passes the windowpane test (where you can stretch a small piece of dough thin enough to see light through it without tearing). After kneading, place the dough in a lightly oiled bowl, cover it with plastic wrap, and let it rise in a warm place for about 60-90 minutes, or until it has doubled in size. The result will be a soft, pillowy dough that’s a joy to work with, regardless of your chosen method.

Assembling Your Zesty Lemon Rolls: Rolling and Filling
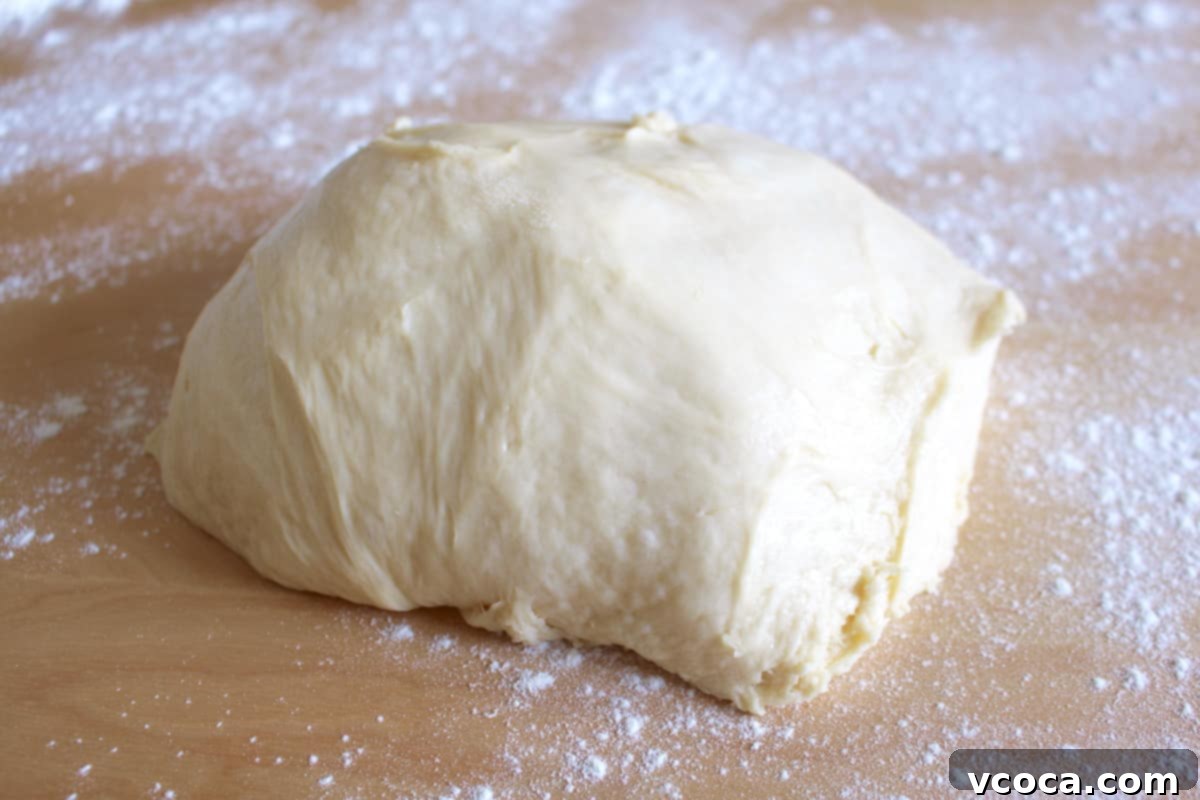
Once your dough has completed its first rise and is beautifully plump, it’s time for the fun part: shaping these glorious lemon rolls! Gently take the dough out onto a lightly floured surface. Avoid adding too much flour, as this can make the rolls tough. Cover the dough loosely with a clean tea towel or plastic wrap and let it rest for about 10 minutes. This crucial resting period allows the gluten to relax, making the dough much easier to roll out without it snapping back.
Next, roll the dough into a large rectangle, aiming for approximately 16 inches by 11 inches (40.6 cm x 28 cm). Don’t worry about being absolutely precise; a close approximation is perfectly fine. Now for the star of the show: the lemon filling! Generously spread a layer of softened butter evenly over the entire surface of the dough, leaving a small border at one of the longer edges. This butter will act as the adhesive for the sugar and lemon zest, and also contribute to the rolls’ tender, rich texture. Some recipes suggest using melted butter, but I’ve found that softened butter is far superior. Melted butter tends to make the dough very slippery and messy when you attempt to cut the rolls, whereas softened butter stays put, making the process much cleaner and easier. After the butter, evenly sprinkle the granulated sugar over the buttered surface, followed by the fragrant lemon zest from two fresh lemons. The zest is where all that bright, citrusy flavor comes from, so don’t skimp!
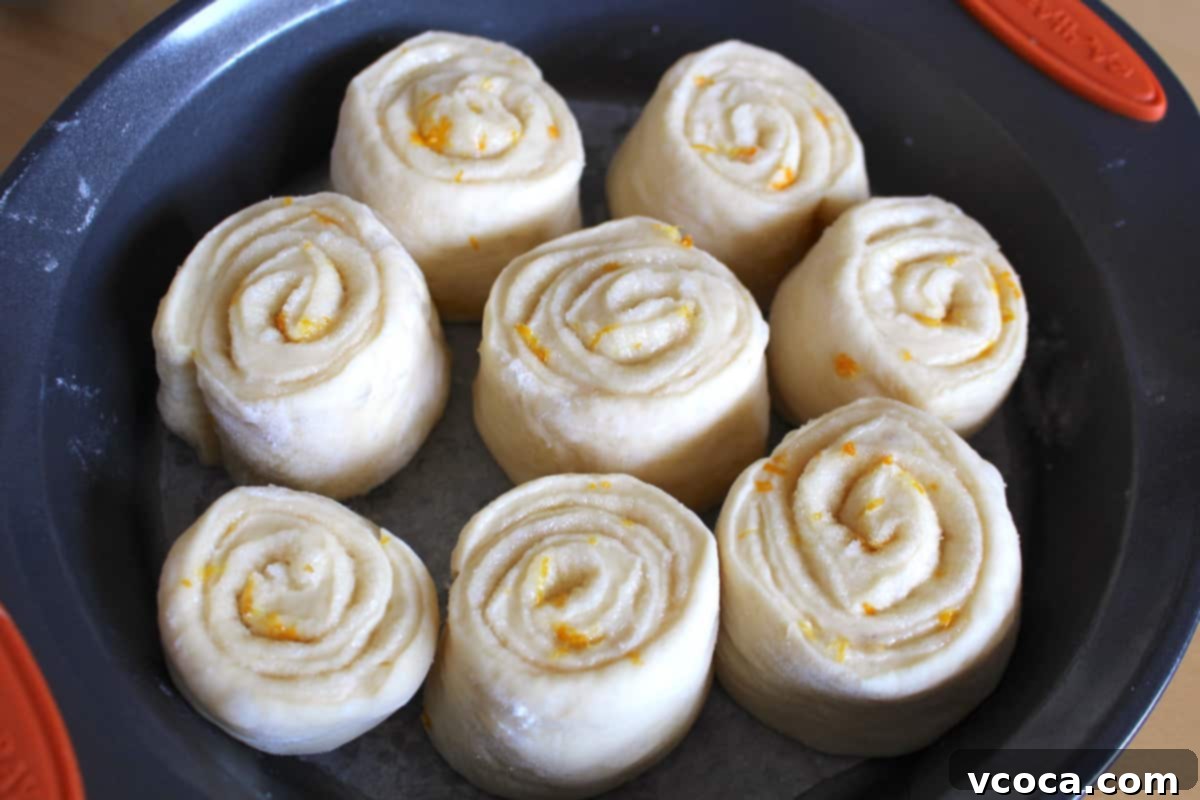
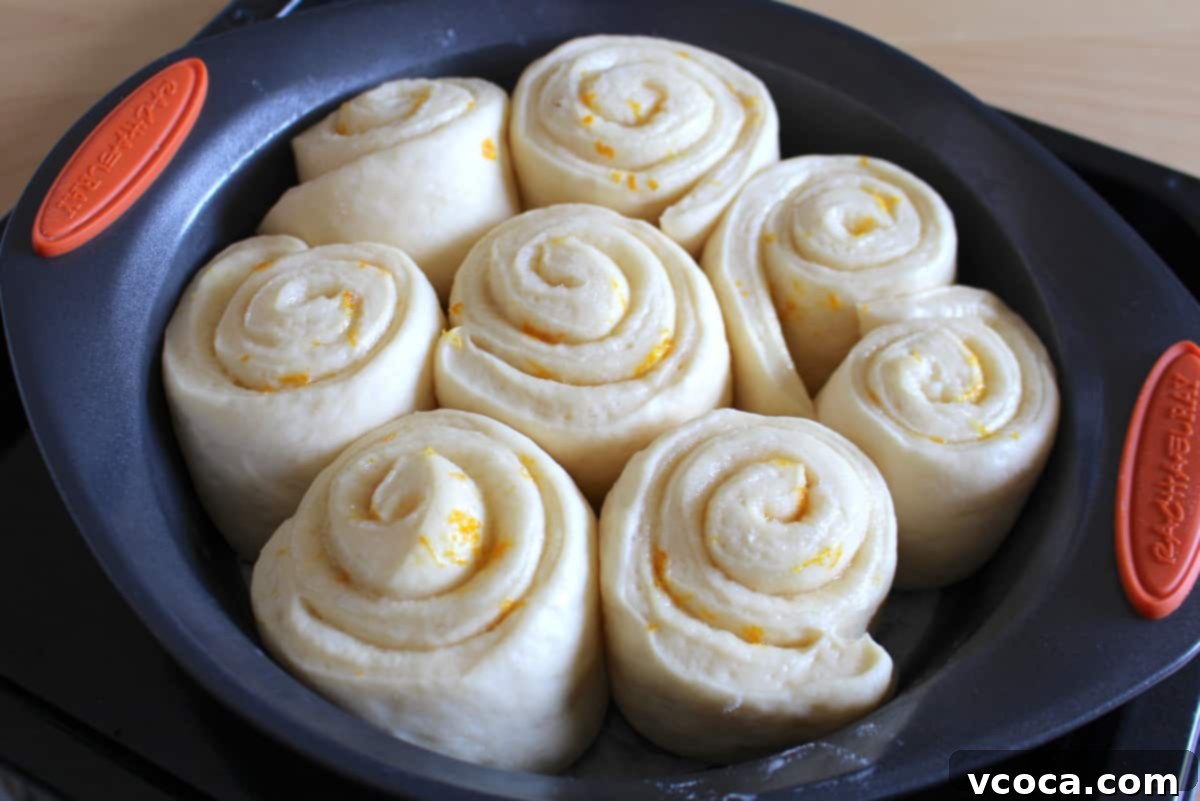
Once the filling is in place, tightly roll up the dough from one of the longer edges into a snug log. The tighter you roll it, the more beautiful and defined your swirls will be. With a sharp knife or unflavored dental floss, cut the log into 8 even pieces. Using dental floss can often give you cleaner cuts than a knife, preventing the rolls from getting squashed. Arrange these beautiful spirals in a 9-inch round baking pan that has been generously greased with butter and lined with parchment paper for easy removal. Cover the pan with a clean tea towel or plastic wrap and let them rise for another 30 minutes in a warm spot. This second rise is vital for achieving that signature fluffy texture.

Baking Perfection: Golden Brown and Aromatic
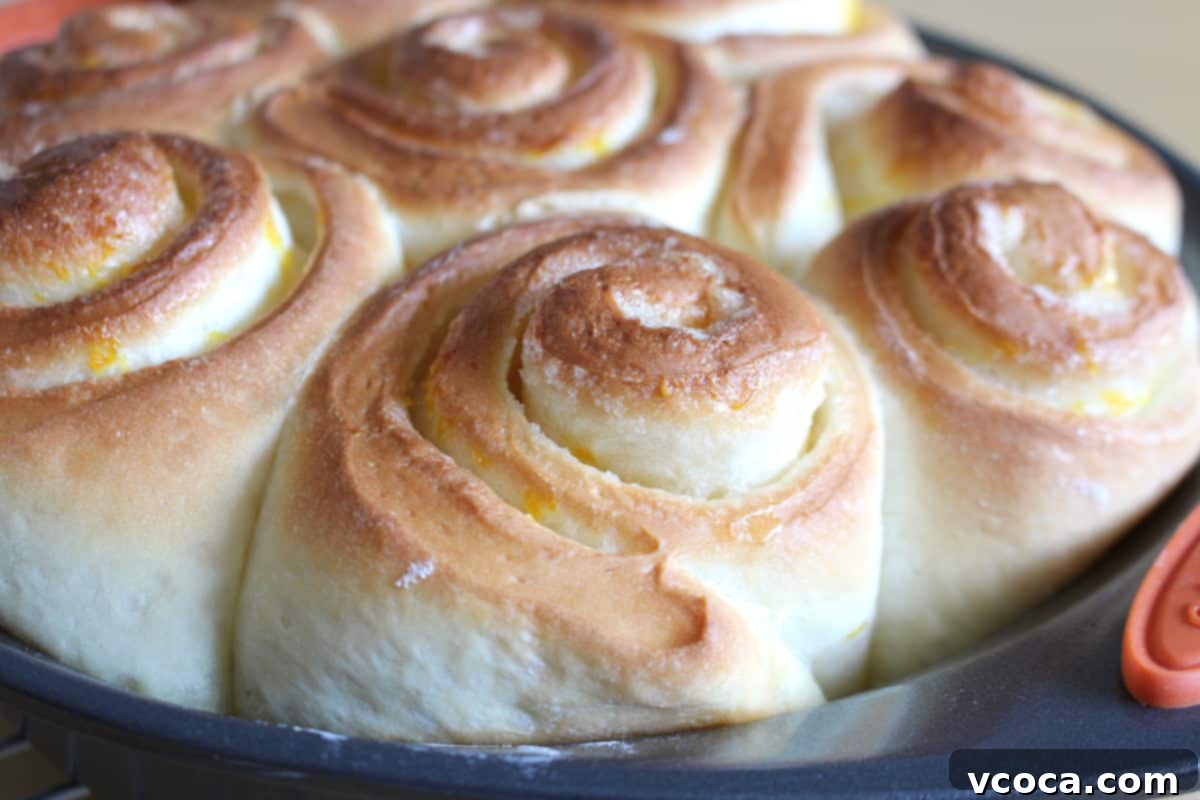
While your lemon rolls are enjoying their final rise, it’s the perfect time to preheat your oven to 392°F (200°C). A properly preheated oven ensures even baking and a beautiful golden-brown crust. Once the rolls have finished rising and your oven is up to temperature, pop them in! Bake for a relatively short time, usually between 15 to 18 minutes. Keep a close eye on them, as oven temperatures can vary. You’re looking for a gorgeous golden hue on top, indicating they are perfectly baked through and have developed a delicious crust while remaining soft inside.

The Zesty Cream Cheese Frosting: A Heavenly Finish
The moment these beautiful rolls emerge from the oven, your kitchen will be filled with the most incredible aroma – a tantalizing blend of sweet bread and bright citrus. It’s a scent that rivals any high-end bakery! While your golden-brown lemon rolls cool slightly, it’s the perfect time to whip up the luxurious cream cheese frosting. This isn’t just any frosting; it’s the perfect counterpoint to the sweetness and tang of the rolls, adding a creamy, rich layer that truly completes the experience.
In a small bowl, combine your softened cream cheese, softened butter, powdered sugar, and a hint of lemon zest. The key here is to ensure both the cream cheese and butter are at room temperature. This allows them to blend smoothly and effortlessly, preventing lumps and creating a beautifully consistent frosting. Beat these ingredients together until the mixture is light, fluffy, and perfectly smooth. The lemon zest in the frosting amplifies the citrus flavor, bringing an extra zing that brightens every bite without overpowering the delicate lemon in the rolls themselves. This balance of creamy, sweet, and tangy is what makes these homemade lemon rolls truly irresistible.

The Grand Finale: Serving and Savoring Your Masterpiece
The moment of truth has arrived! Gently remove the slightly cooled lemon rolls from their pan. They should come out easily thanks to the parchment paper. Now, with your luscious cream cheese frosting ready, generously smear it all over the warm, soft rolls. The warmth of the rolls will slightly melt the frosting, allowing it to seep into every crevice, creating an unbelievably sticky, sweet, and tangy glaze. And then, there’s only one thing left to do: tuck in!

You absolutely must try at least one lemon roll while they are still warm. This is truly when they are at their absolute best – incredibly fluffy, wonderfully sticky from that glorious frosting, bursting with vibrant lemon flavor, and utterly delightful in every single bite. The contrast of the soft, tender bread with the sweet-tart filling and the creamy frosting is a symphony of textures and tastes that will leave you craving more. These aren’t just pastries; they’re a culinary experience!
I implore you to make them! These homemade lemon rolls are perfect for so many occasions. Bring them to a weekend brunch with friends, where they are sure to be the star of the table. Share them with appreciative coworkers at the office for a delightful morning treat. Or, if you prefer, don’t tell a soul you’re baking these and devour every single one on your own – I won’t judge, I promise! They are that good. The bright, refreshing lemon flavor makes them a wonderful departure from traditional cinnamon rolls, offering a lighter, zestier alternative that’s perfect for summer or whenever you need a little burst of sunshine.
Tips for Perfect Lemon Rolls Every Time
- Quality Lemons: If you can find Meyer lemons, they offer a unique, sweeter, and more aromatic flavor. Regular lemons work well too, but Meyer lemons truly elevate the experience.
- Room Temperature Ingredients: Ensure butter, eggs, milk, and cream cheese are at room temperature for the dough and frosting. This helps them combine smoothly and achieve the best texture.
- Don’t Over-Flour: When rolling out the dough, use just enough flour to prevent sticking. Too much flour can make your rolls dry and dense.
- Tight Roll for Swirls: Rolling the dough tightly ensures those beautiful, distinct spirals that are so appealing in a sweet roll.
- Proper Rising: Allow adequate time for both rises. A warm, draft-free environment is ideal. If your kitchen is cool, a slightly warm oven (turned off!) or proofing drawer works wonders.
- Watch the Oven: Ovens can vary. Keep an eye on your rolls during the last few minutes of baking. They should be golden brown, not dark.
- Frost While Warm: Frosting the rolls while they’re still warm allows the cream cheese frosting to melt slightly and seep into the nooks and crannies, making them extra moist and flavorful.
Storage and Reheating
These lemon rolls are best enjoyed fresh and warm on the day they are baked. However, if you have leftovers (a rare occurrence!), they can be stored in an airtight container at room temperature for up to 2 days, or in the refrigerator for up to 4 days due to the cream cheese frosting. To reheat, simply pop them in the microwave for 15-30 seconds or in a preheated oven at 300°F (150°C) for about 5-10 minutes until warmed through. This will bring back their soft texture and gooey frosting.
Frequently Asked Questions About Lemon Rolls
Can I use regular lemons instead of Meyer lemons?
Absolutely! While Meyer lemons offer a unique, sweeter, and slightly floral flavor, regular lemons will still produce delicious and wonderfully zesty lemon rolls. You might want to adjust the amount of zest or juice slightly if you prefer a less tart flavor, but the recipe works perfectly with standard lemons.
Can I prepare the dough ahead of time?
Yes, you can! After the first rise, you can punch down the dough, place it in a lightly oiled bowl, cover it tightly with plastic wrap, and refrigerate it overnight (up to 24 hours). The next day, let it come to room temperature for about 30-60 minutes before rolling, filling, and baking as instructed. This makes them a perfect make-ahead breakfast or brunch treat.
Can I freeze baked lemon rolls?
Yes, you can! For best results, freeze them unfrosted. Once cooled, wrap individual rolls tightly in plastic wrap and then in aluminum foil. They can be frozen for up to 1 month. Thaw at room temperature and then reheat gently before frosting. You can also freeze them after frosting, but the texture of the frosting may change slightly upon thawing.
What if my rolls don’t rise?
Lack of rise usually points to inactive yeast. Ensure your yeast is fresh and activated with warm (not hot!) milk. The ideal temperature for activating yeast is between 105-115°F (40-46°C). Also, make sure your rising environment is warm and draft-free. Patience is key when working with yeast!
What delicious delights did you get up to this weekend? I’d love to hear about your culinary adventures in the comments below!


Lemon Rolls
Breakfast, Snack, Dessert
American
Ai Willis
Print
Pin
Rate
Ingredients
Bread Dough
- 285g bread flour
- ½ teaspoon fine sea salt
- ¼ cup granulated sugar
- 38g unsalted butter
- 1 large egg
- ½ cup warm milk (105-115°F/40-46°C)
- 1¼ teaspoon active dry yeast
Filling
- 38g butter, softened
- 100g granulated sugar
- zest of 2 lemons (preferably Meyer lemons)
Cream Cheese Frosting
- 50g cream cheese, softened
- 30g butter, softened
- ½ cup powdered sugar
- zest of ½ a lemon
Instructions
-
Lightly grease a 9-inch round baking pan with butter, then line the bottom with parchment paper. Set aside.
-
For Bread Machine: Add all bread dough ingredients to your bread machine according to your machine’s instructions (liquids first, then dry ingredients, then yeast on top). Select the “dough” cycle and start.For Stand Mixer/By Hand: In a small bowl, combine warm milk and active dry yeast; let sit for 5-10 minutes until foamy. In a large mixing bowl, combine bread flour, salt, and granulated sugar. Add the activated yeast mixture, egg, and softened butter. Knead with a stand mixer (dough hook attachment) on medium-low speed for 8-10 minutes, or by hand on a lightly floured surface for 10-15 minutes, until the dough is smooth and elastic. Place in a lightly oiled bowl, cover, and let rise in a warm place for 60-90 minutes, or until doubled in size.
-
Once the dough cycle is complete (or after the first rise), take the finished dough out onto a lightly floured surface, cover loosely, and let it rest for about 10 minutes to relax the gluten.
-
Roll out the dough into a 16in x 11in (40.6cm x 28cm) rectangle. Evenly spread the softened butter over the entire surface of the dough, leaving a small border on one long edge. Then, evenly sprinkle the granulated sugar and lemon zest over the butter.
-
Tightly roll up the dough into a log, starting from the long edge opposite the one you left plain. Slice the log into 8 even rolls using a sharp knife or unflavored dental floss.
-
Arrange the rolls in the prepared 9-inch pan. Cover the pan with a clean tea towel or plastic wrap and let them rise for about 30 minutes in a warm, draft-free place, or until visibly puffy.
-
While the rolls are rising, preheat your oven to 392°F (200°C).
-
Bake the rolls for 15 to 18 minutes, or until they are golden brown on top and cooked through.
-
While the rolls are cooling slightly (but still warm), prepare the cream cheese frosting. In a small bowl, beat together the softened cream cheese, softened butter, powdered sugar, and lemon zest until smooth and fluffy.
-
Remove the warm lemon rolls from the pan (or frost directly in the pan), generously spread the cream cheese frosting over them, and serve immediately. Enjoy!
Love this recipe?Snap a photo and share tagging @aimadeitforyou or tag #aimadeitforyou!
